
Live Chat

Domain Scan

(empty)

Login
How to Backup Your WordPress Website to Google Drive
(16-aug-2024)
Ensuring that your WordPress website is backed up is crucial for maintaining the safety and integrity of your data. One of the most convenient and reliable ways to store your WordPress website backups is in Google Drive. This guide will walk you through the steps to set up your WordPress backups to be automatically stored in Google Drive once they are created using the Softaculous tool. Additionally, you can use this method to backup any app installation made through Softaculous to Google Drive.
Why is it Important to Keep a WordPress Backup in Google Drive?
Backing up your WordPress website to a cloud storage like Google Drive offers several vital benefits:- Cloud Storage Reliability: Google Drive provides a secure and reliable cloud storage solution that is far less vulnerable to local hardware failures, theft, or physical damage.
- Universal Accessibility: Backups stored in Google Drive can be accessed from anywhere with an internet connection, making it easy to restore your site no matter where you are.
- Hosting Compliance: Storing backups directly on shared hosting environments is typically not allowed. In Register.lk shared hosting packages, you can create unlimited backups. However, these backups should be removed once you download them to local or cloud storage. This practice of directly storing a backup of your WordPress website in Google Drive ensures that the backup won't consume space in your web hosting package, optimizing both performance and resource efficiency.
Note: This backup method is applicable only if your WordPress site was installed through Softaculous. If WordPress was installed through another method, you would need to use a different backup process.
Setting Up Google Drive Storage for Your WordPress Backups with Softaculous
Softaculous is a popular auto-installer tool that makes it easy to install and manage applications on your website. Here's how you can configure Softaculous to store your WordPress website backups in Google Drive.Step 1: Access Softaculous in Your Hosting Control Panel
- Login to cPanel.
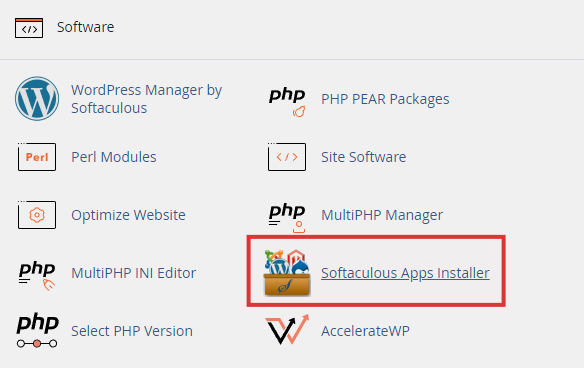
- Locate Softaculous Apps Installer.
 Step 2: Configure Backup Settings
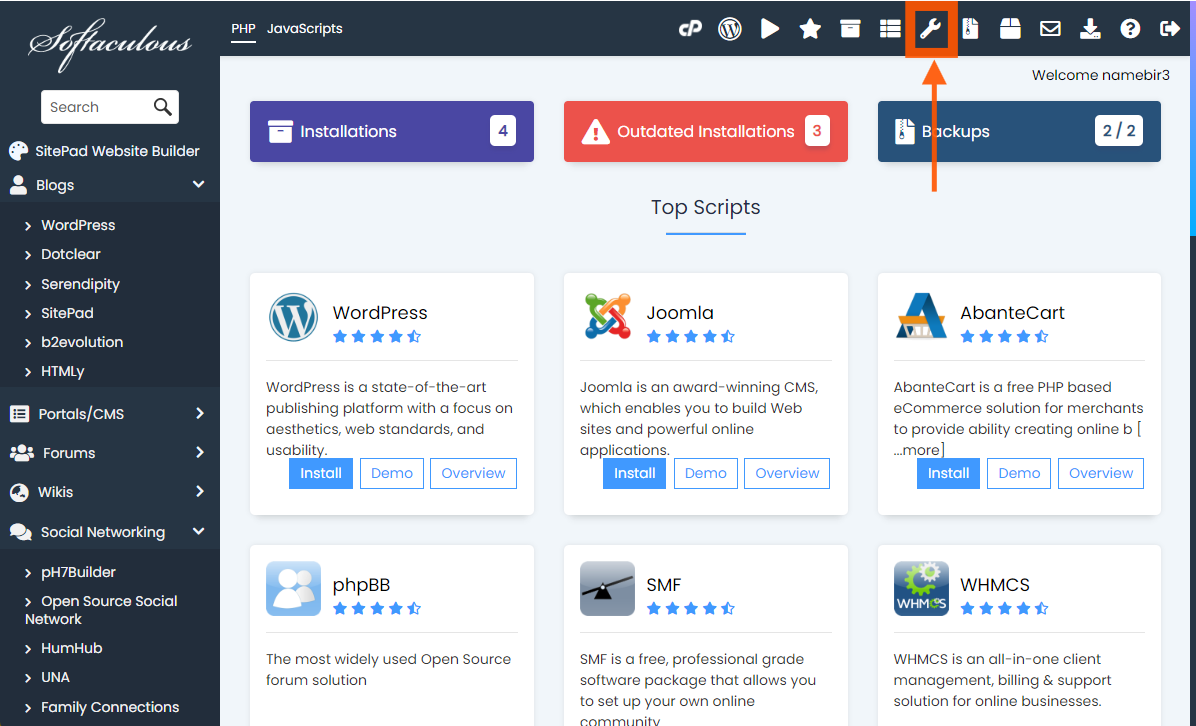
- Click on the tool icon to Edit Settings.
- Under Backup Locations, click on Add Backup Location.
- Select Protocol as Google Drive and fill in the location name and backup location.
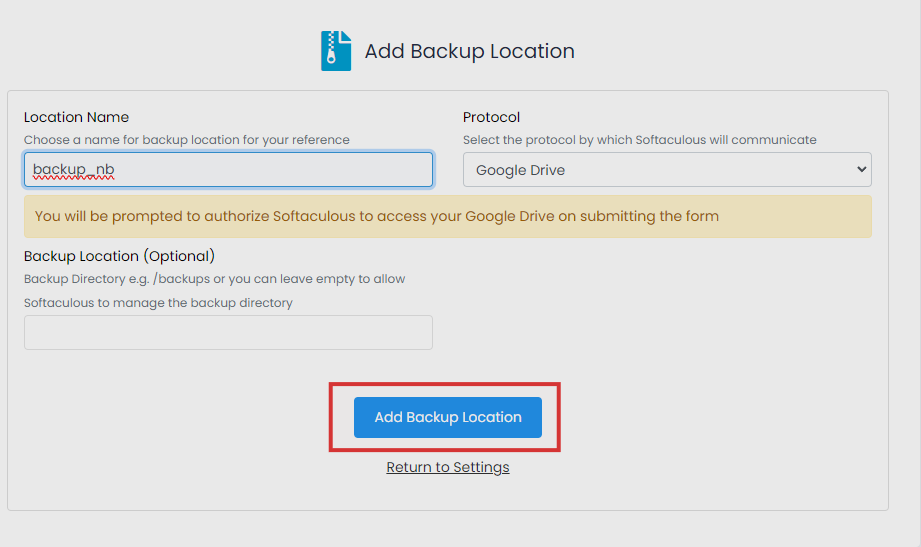
Note: If you do not specify a Backup Location, Softaculous will save the backups in a default folder named "Softaculous Auto Installer" within your Google Drive. If you do provide a specific location, that folder will be created within the "Softaculous Auto Installer" directory, and your backups will be stored there.
Step 3: Authorize Softaculous to Access Google Drive
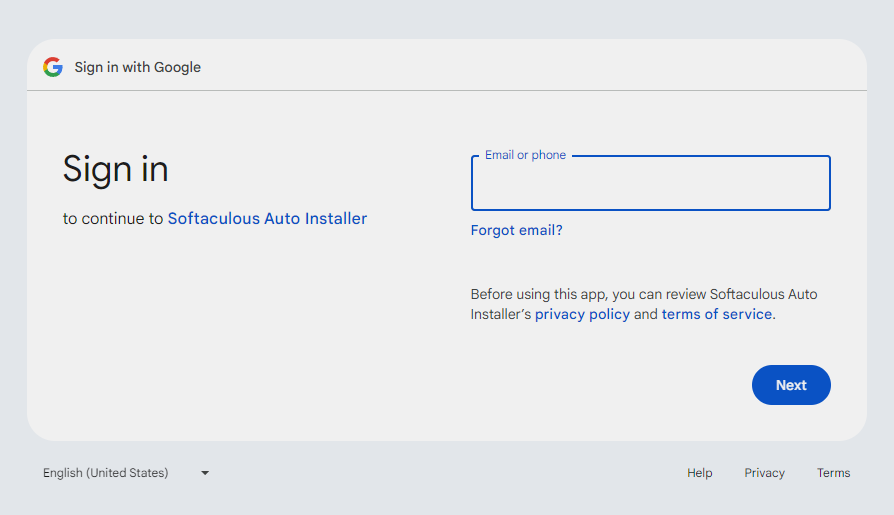
- Authorization Process:
- You will be asked to log in to your Google account and authorize Softaculous to access your Google Drive.
- Follow the on-screen instructions to complete the authorization.
- Verify the Connection:
- Once authorized, Softaculous will test the connection to ensure it can access your Google Drive.
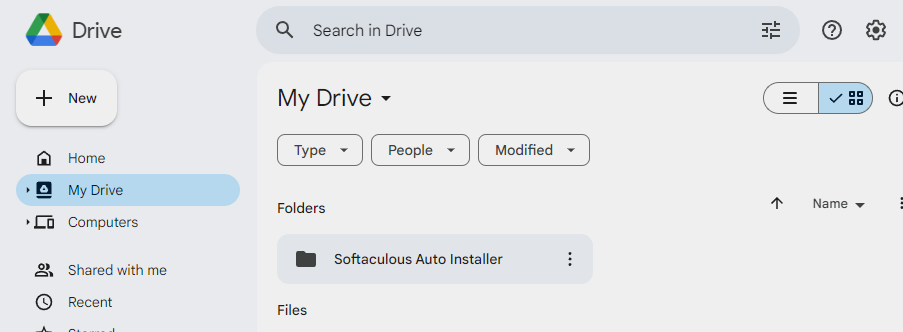
- You should see a confirmation message indicating that the connection is successful. Also, you will be able to see the "Softaculous Auto Installer" folder created in your Google Drive.
 Step 4: Set Up Backup Storage
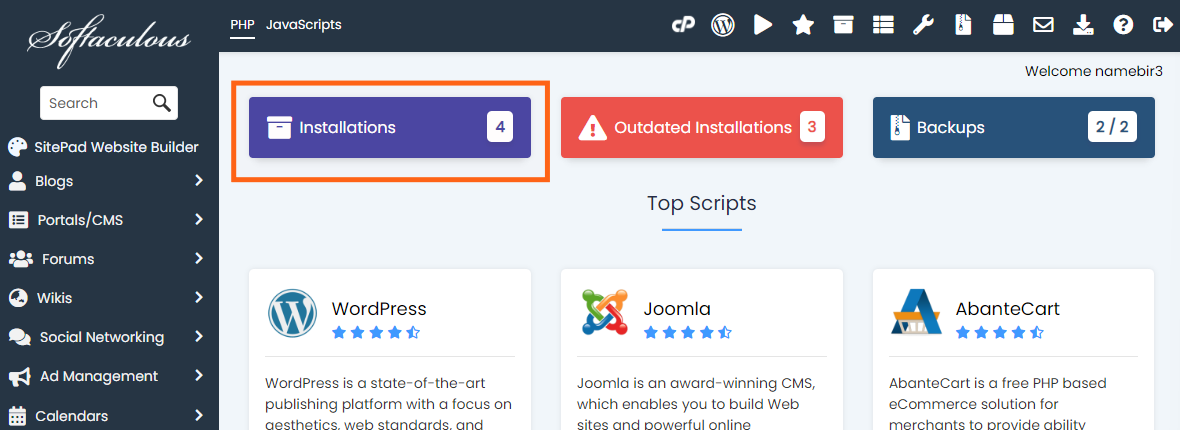
- Click on the Softaculous logo to go to the Softaculous home page.
- Click on Installations.
- Next to the domain name and the path where the Softaculous installation was made, you will see a backup icon. Click on that, which will open the backup operations page.
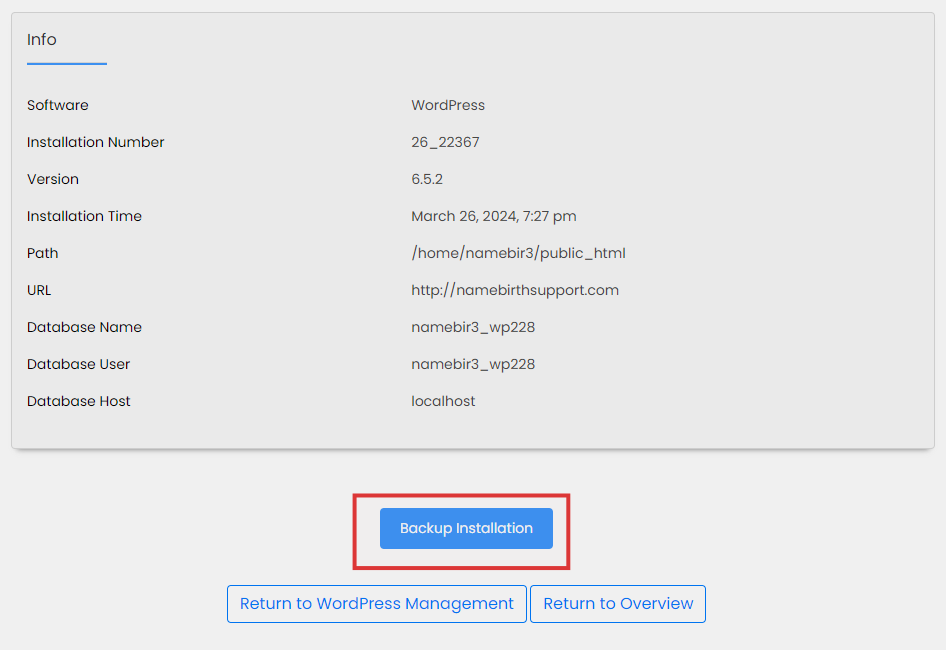
- Select the backup location as the name you provided when creating the Google Drive backup (Step 2).
- Click on the Backup Installation button at the end of the page.
- That's it! You will be able to see the backup stored in your Google Drive once it is generated. This process can take some time, depending on the size of the backup.
Bonus Tip: If you want to avoid selecting Google Drive every time you create a backup, you can set Google Drive as the default backup storage location. Simply go to Softaculous App Installer, click on the tool icon to Edit Settings, and under the Backup Locations section, select Google Drive as the default backup location.
Conclusion
By following these steps, you can easily set up your WordPress website backups to be stored in Google Drive using Softaculous. Keeping your backups in an external location like Google Drive is not only convenient but also essential given the restrictions on storing backups within shared hosting environments. This practice ensures your data is safe, accessible, and doesn't impact your hosting performance. Additionally, this method can be used to back up any app installation made through Softaculous to Google Drive.By following these steps, you can confidently safeguard your WordPress website, knowing your backups are securely stored on Google Drive and ready for quick restoration whenever needed.
 Written by: Register.lk Support Hero - Kesaru


