
Live Chat

Domain Scan

(empty)

Login
How to Create Bulk Email Accounts at Once in cPanel
(25-oct-2024)

Managing multiple email accounts can be a hassle, especially when you're setting them up for a team or clients. Fortunately, cPanel makes it easy to import multiple email accounts in bulk using either a CSV (Comma-Separated Values) or an XLS file. In this guide, we'll focus on how to accomplish this using a CSV file, which is straightforward and widely supported. We'll walk you through the entire process, from preparing your CSV file to troubleshooting common issues. Let's dive in!
Why Use the Bulk Import Option?
If you need to create multiple email accounts at once, doing so manually can be time-consuming and error-prone. The bulk import option in cPanel allows you to automate this process, ensuring consistency and saving valuable time. Whether you're setting up accounts for a new team, migrating from another email provider, or managing multiple client accounts, bulk import streamlines the entire process, reducing the potential for mistakes and allowing you to focus on other important tasks.
Preparing Your CSV File
The first step in bulk importing email accounts is to prepare a CSV (Comma-Separated Values) or an XLS file. This file should contain all the necessary details for each email account you want to create. The format is simple, and you can download a sample CSV/XLS file to organize your data from cPanel => Address Importer => 'Check out our example page'.
Example CSV Format:
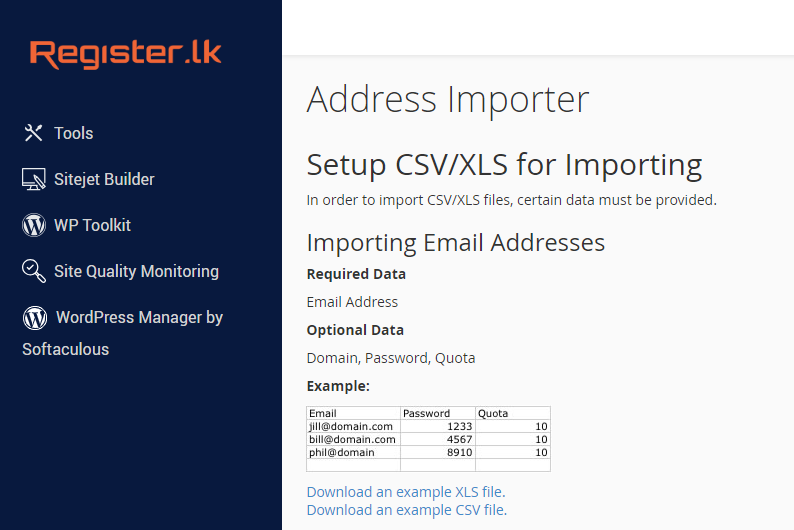
Each line in the CSV file represents an email account with the following details:
- Email: The email address you wish to create.
- Password: The password for the account. Make sure the password meets your security criteria to ensure account safety.
- Quota: The storage limit (in megabytes) assigned to each email account.
Once you've prepared your CSV file, make sure to save it with the .csv extension. This format is essential for cPanel to recognize and process the file correctly.
Importing the CSV File into cPanel
Now that your CSV file is ready, it's time to upload it to cPanel. Here's a step-by-step guide to help you through the process:
Step 1: Log into cPanel
First, log in to your cPanel account. This can typically be done by navigating to 'yourdomain.com/cpanel' and entering your credentials.
Step 2: Navigate to the Email Section
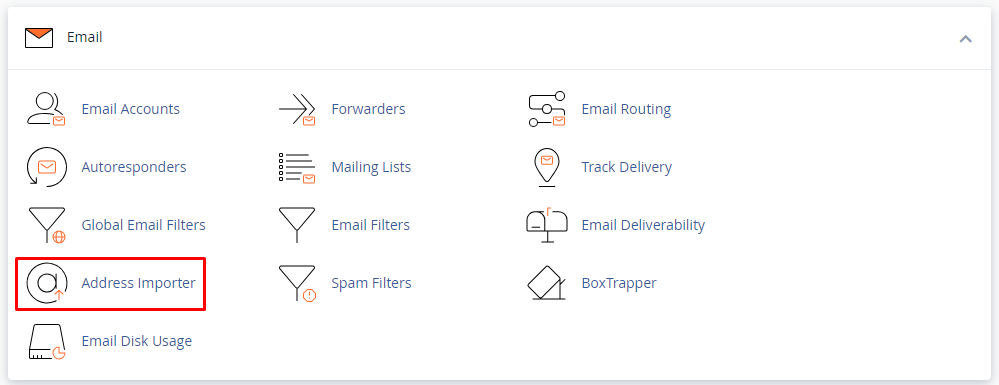
Once inside cPanel, locate the Email section and click on Address Importer.
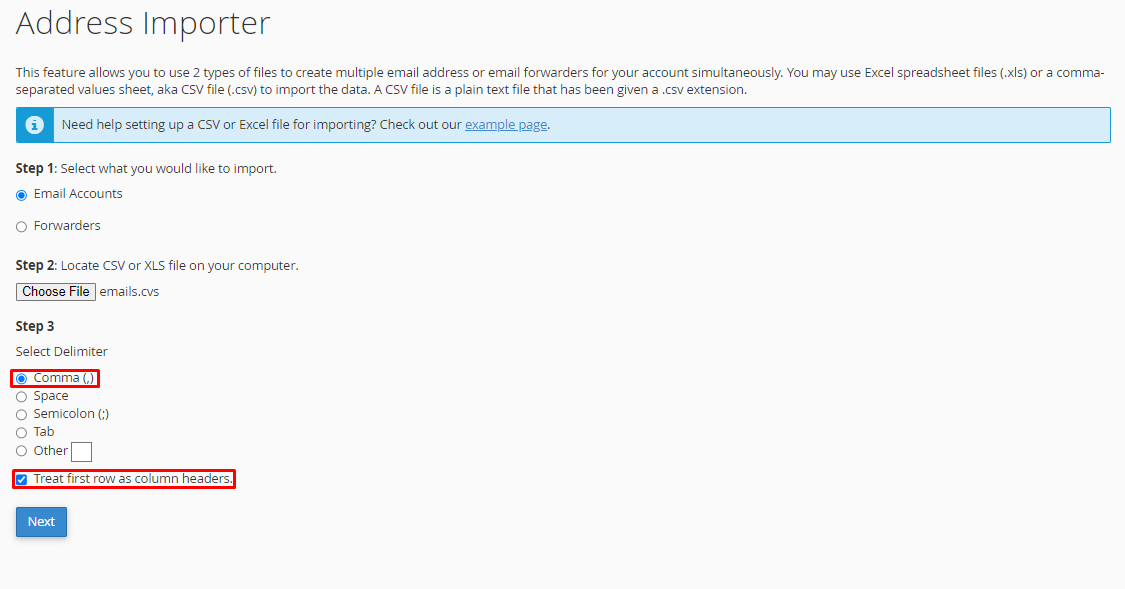
Step 3: Select Email Accounts
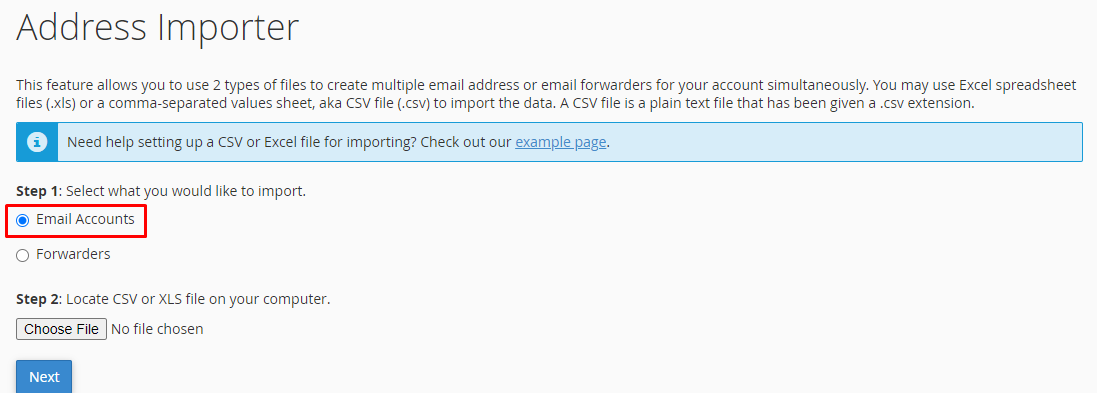
In the Address Importer, you'll be prompted to select the type of data you want to import. Choose Email Accounts.
Step 4: Upload Your CSV File
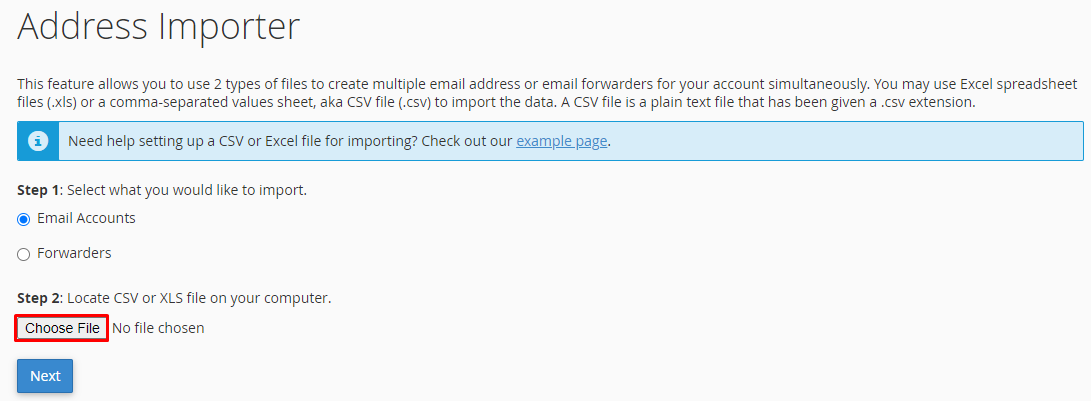
Click on Choose File and locate the CSV file on your computer. Ensure you select the correct file before proceeding.
Step 5: Confirm Delimiters and Headers
Verify that commas are used as delimiters (this is standard for CSV files). If your CSV has a header row (as shown in the example above), check the box labeled "Treat first row as column headers".
Step 6: Preview the Import
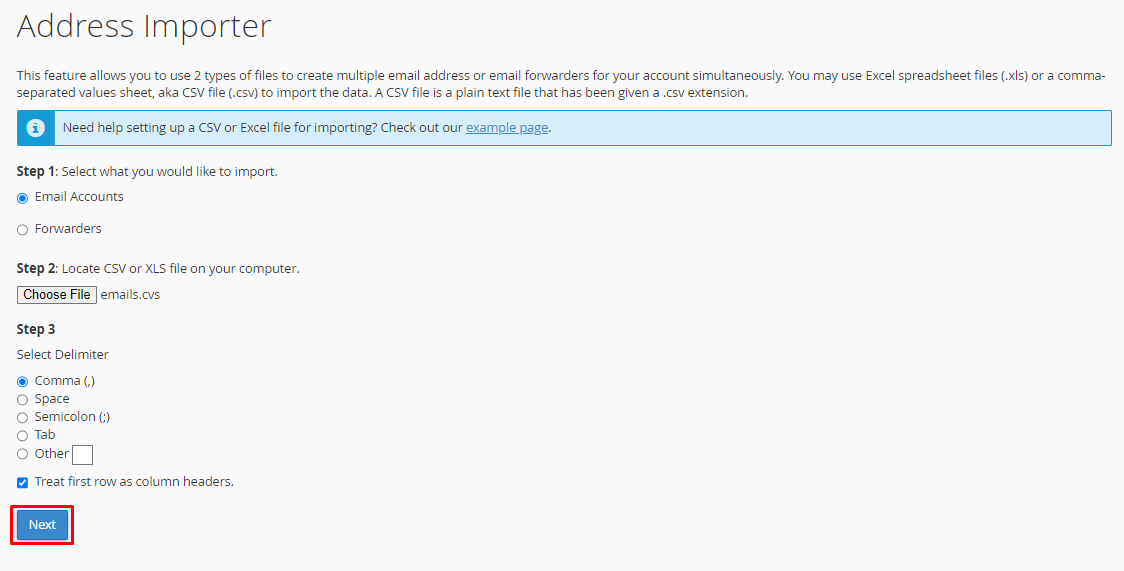
Click Next to preview the list of email accounts that will be imported. This is your chance to double-check everything.
Step 7: Begin the Import Process
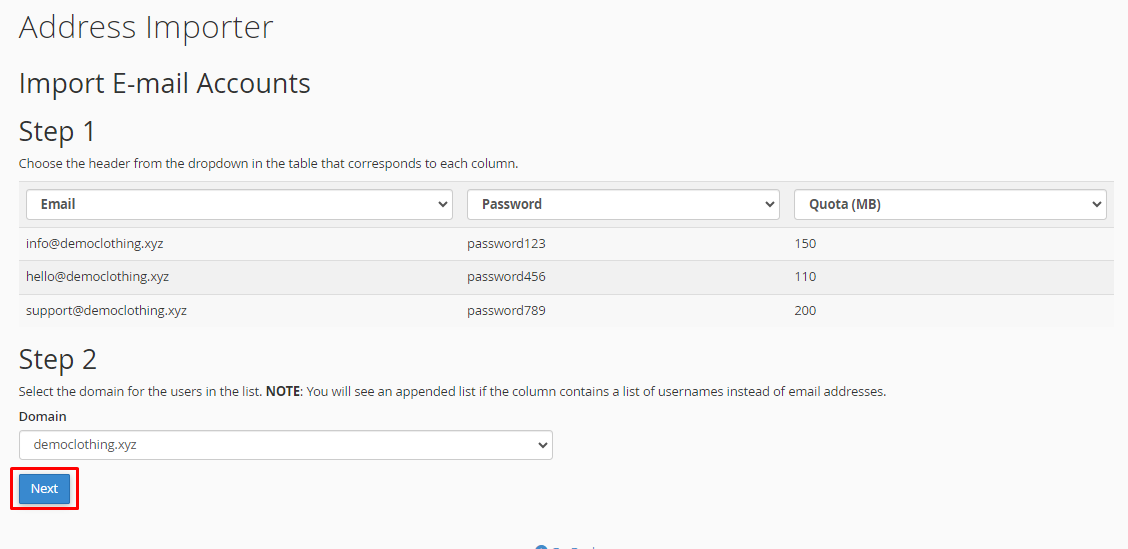
If everything looks correct, click Next to start the import process. cPanel will create the email accounts based on the information in your CSV file.
Step 8: Finish the Import
Once the import is complete, click Finish to finalize the process. You should see a confirmation message indicating that your email accounts have been successfully created.

Verifying the Import
After completing the import, it's important to verify that all the email accounts have been created correctly. Here's how you can do that:
- Check the Email Accounts List: Go back to the Email Accounts section in cPanel. Here, you'll see a list of all the email accounts that were created during the import. Verify that each account appears as expected.
- Test Login: To be absolutely sure, try logging into one or more of the new email accounts using a webmail client or an email client like Outlook or Thunderbird. This step ensures that the accounts are functional and that the passwords work.
Common Errors and Troubleshooting
Even with careful preparation, you might encounter some common errors during the import process. Here are a few tips to troubleshoot and resolve them:
- CSV Format Errors: If cPanel doesn't accept your CSV file, double-check the format. Ensure that there are no extra spaces, missing commas, or incorrect file extensions.
- Password Issues: If some accounts fail to import due to password issues, review your CSV file to ensure that the passwords meet cPanel's security requirements. Passwords should be strong, with a mix of letters, numbers, and special characters.
- Quota Limits: If cPanel rejects certain accounts due to quota limits, consider adjusting the storage quota for those accounts in the CSV file. Make sure the quota does not exceed the available space on your server.
- Delimiter Issues: If the import process shows errors related to delimiters, confirm that your CSV file uses commas as the delimiter. If you're using a different delimiter, make sure to specify it correctly during the import process.
- Account Already Exists: If an email account already exists, cPanel will typically skip it during the import. If you need to update the account, you may need to delete the existing one or manually adjust it.
Conclusion
Bulk importing email accounts in cPanel is a straightforward and efficient way to manage multiple accounts simultaneously. By preparing a well-structured CSV file and following the steps outlined above, you can quickly set up all necessary accounts with minimal effort. Remember to verify your import to ensure everything is in order, and don't hesitate to troubleshoot any errors that may arise.
At register.lk, the #1 domain and hosting provider in Sri Lanka, we're committed to making your web hosting experience as smooth and hassle-free as possible. If you have any questions or run into issues, our support team is always here to help.
Experience effortless email management with cPanel and register.lk.
 Written by: Register.lk Support Hero - Kulitha


