Live Chat

Domain Scan

(empty)

Login
How to Increase Your Email Deliverability with SPF, DKIM, and DMARC
(24-aug-2024)

Email deliverability is a crucial aspect of maintaining your online presence, especially for businesses. Ensuring that your emails reach your recipients' inboxes, rather than their spam folders, involves configuring SPF, DKIM, and DMARC records in your DNS settings. This blog post will guide you through the process of adding these records, explain the purpose of these records, and demonstrate how they improve email deliverability.
Understanding SPF, DKIM, and DMARC Records
SPF (Sender Policy Framework), DKIM (DomainKeys Identified Mail), and DMARC (Domain-based Message Authentication, Reporting, and Conformance) are essential DNS TXT records that help authenticate your emails.- SPF: Specifies which mail servers are authorized to send emails on behalf of your domain. This helps prevent spammers from sending unauthorized emails that appear to come from your domain, reducing the chances of your emails being marked as spam.
- DKIM: Adds a digital signature to your emails, ensuring that the content hasn't been altered during transmission. This adds another layer of security, making it harder for malicious actors to tamper with your emails.
- DMARC: Works in conjunction with SPF and DKIM, allowing the domain owner to specify how emails that fail these checks should be handled (allowed, quarantined, or rejected). DMARC also provides a mechanism for receiving reports about how emails are being processed by various email providers.
Adding SPF, DKIM, and DMARC Records to Your DNS Panel
When updating TXT records like SPF, DKIM, and DMARC, it's essential to update them in the correct DNS zone. This means you need to make these changes in the location where your domain's DNS settings are actually managed. If your domain's nameservers are controlled through a particular provider, you must ensure that the TXT records are updated in that provider's DNS management interface. It's crucial to know where your nameservers are configured because updating the records in the wrong place will not have any effect. To check what nameservers you have already updated on your domain, you can use this tool.Alright, let's find out how we can generate an SPF record using the cPanel itself.
How to Add an SPF Record
- Access cPanel:
- Log in to your Register.lk cPanel.
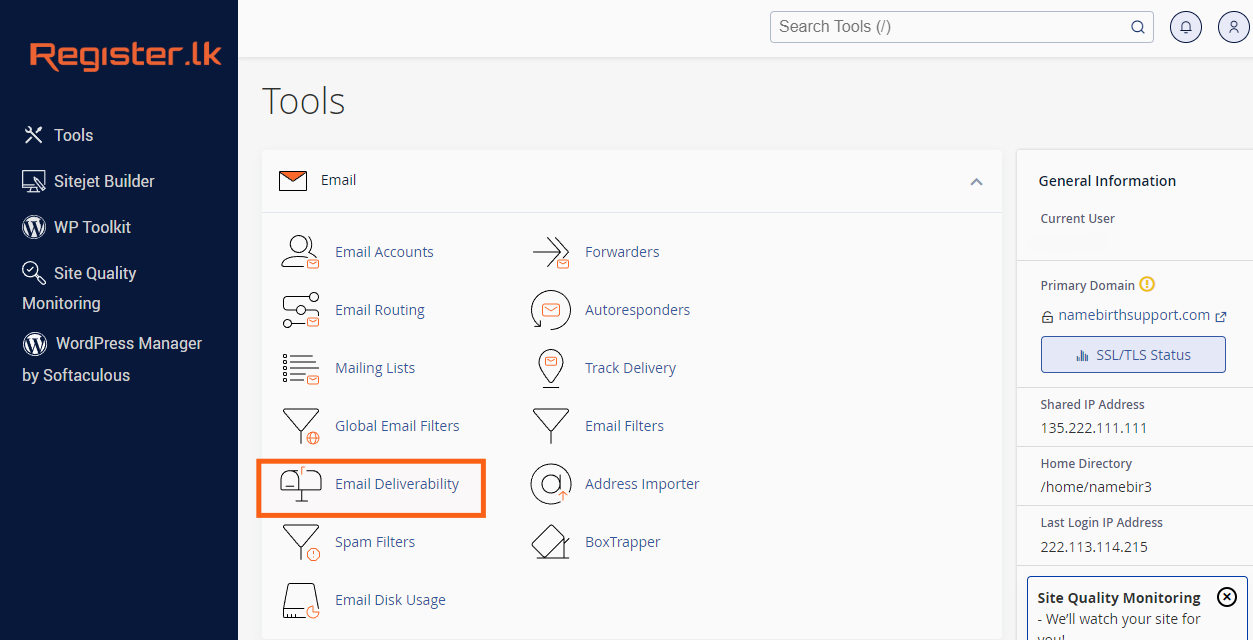
- Navigate to the "Email Deliverability" section.
- Select Your Domain:
- Choose the domain for which you want to set up the SPF record. The page will display the current status of the SPF and DKIM records. If the records are not properly created, the status will show "Problem Exist (DKIM and SPF)". In that case, click on "Manage".
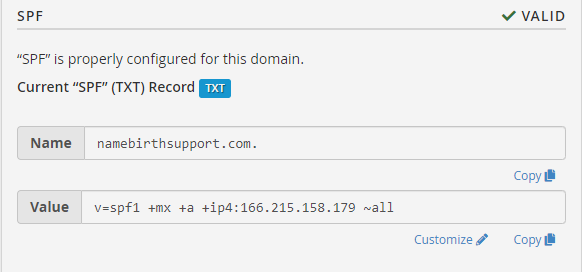
- Copy the SPF Record's Name and Value:
- Copy the Name and Value fields provided under the "SPF" section.


Update Your Main DNS Zone
Follow the steps below only if you have pointed your domain to Register.lk hosting packages directly through nameservers. If not, you need to add the copied records to the Main DNS Zone of your domain, which is pointed to by your domain's nameservers.- Go to Zone Editor in cPanel.
- Click on the Add Record button.
- In the Name field, paste the details of the SPF record's name.
- For TTL, keep the default value (usually 14400).
- Select TXT as the record type.
- In the Record field, paste the value copied in the above steps.
- Save the record.
How to Add a DKIM Record
DKIM is another crucial record that ensures the integrity of your emails by adding a digital signature.Let's find out how we can generate a DKIM record using the cPanel itself.
- Access cPanel:
- Log in to your Register.lk cPanel.
- Navigate to the "Email Deliverability" section.
- Select Your Domain:
- Choose the domain for which you want to set up the DKIM record. The page will display the current status of the SPF and DKIM records. If DKIM is not set up or needs to be updated, click on "Manage".
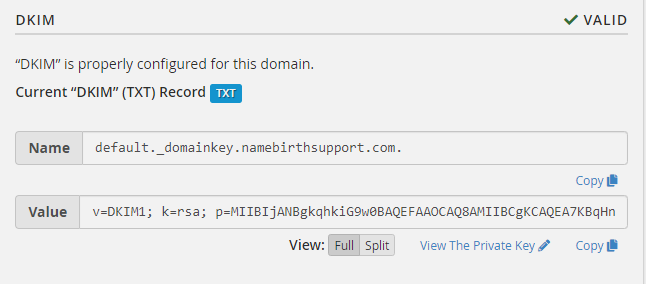
- Copy the DKIM Record's Name and Value:
- Under the "DKIM" section, you will see the DKIM record details. Copy the Name and Value fields.

Update Your Main DNS Zone
Follow the same steps outlined earlier in the "How to Add an SPF Record" section to update the DKIM Record in your Main DNS Zone. Make sure you update the correct DNS management interface based on where your domain's nameservers are pointed to.Tip:
If you don't have SPF and DKIM records already set up in your cPanel > Zone Editor, you can use the "Repair" button in the Email Deliverability section to update it automatically. However, if there is already an incorrect SPF record and DKIM record, you should manually remove the incorrect ones before adding the new records; otherwise, you would receive an error after clicking the repair button.
Alright, now that we've covered SPF and DKIM, let's move on to adding a DMARC record. Unlike SPF and DKIM, generating a DMARC record cannot be done from cPanel; we should use a third-party tool for that.
How to Add a DMARC Record
Adding a DMARC record provides an additional layer of protection and ensures that your emails are properly authenticated. Before we proceed with the steps, ensure that you have valid SPF and DKIM records already in place. To generate a DMARC record, we will use the Global Cyber Alliance DMARC Guide.Go through the wizard to complete the following steps.
- Generate a DMARC Record:
- Visit Global Cyber Alliance DMARC Guide and click on the DMARC Guide button to start generating a DMARC record.
- Enter your domain name and click Next.
- Set the DMARC Policy Level:
- Choose the appropriate policy level, which determines what action should be taken if an email fails SPF and DKIM checks:
- None: Monitor emails without affecting deliverability.
- Quarantine: Send suspicious emails to the spam folder.
- Reject: Block emails that fail SPF and DKIM checks.
- For beginners, it's advisable to start with the None option.
- Optional: Aggregate Reports:
- You can specify an email address to receive daily reports about email activity. Be cautious as this can lead to a large volume of reports if your domain sends a lot of emails. Consider skipping this step unless you need detailed reporting.
- Optional: Forensic Reports:
- This option adds the 'ruf' tag to your DMARC policy, generating forensic reports when available. However, due to privacy regulations, these reports might not always be generated. Consider skipping this step.
- Subdomain Policy:
- Decide whether you want the DMARC policy to apply to your subdomains as well.
- DMARC Record Frequency:
- Choose how often you want the DMARC record to be generated.
Alright, now you can see the generated DMARC record.
This is what the result would look like:
 Adding DMARC records can vary depending on the DNS panel you use. To update your Main DNS Zone in the cPanel, follow the similar steps you've used previously for other records.
This is how it looks like when you are setting up the DMARC record in cPanel.
 Verifying Your SPF, DKIM, and DMARC Records
After adding the SPF, DKIM, and DMARC records, it may take some time for DNS propagation. To verify that your records have been updated correctly, you can use the following tools:
- SPF Record Check: Use tools like MXToolbox SPF Lookup to verify your SPF record.
- DKIM Record Check: Use tools like DKIM Validator to ensure your DKIM is properly configured.
- DMARC Record Check: Visit the Global Cyber Alliance DMARC Guide to check if your DMARC record is correctly set up.
Conclusion
By properly setting up SPF, DKIM, and DMARC records, you significantly improve your email deliverability and protect your domain from email spoofing and phishing attacks. Always remember to update these records in the correct DNS zone based on where your domain's nameservers are pointed. Following these steps will help ensure that your emails reach your recipients' inboxes, improving communication and trust with your audience.Setting up SPF, DKIM, and DMARC not only boosts your email deliverability but also helps improve your email reputation. A small effort today ensures secure and trustworthy communication.
 Written by: Register.lk Support Hero - Kesaru


