


Live Chat

Domain Scan

(empty)

Login

How to Install a Premium SSL on Your Domain?
- with Register.lk

In today's digital age, security is paramount, especially when it comes to protecting sensitive information transmitted over the internet. This is where SSL, or Secure Sockets Layer, comes into play. SSL is a standard security technology that establishes an encrypted link between a web server and a browser, ensuring that all data passed between them remains private and integral.
When you visit a website with SSL enabled, you'll notice a padlock icon next to the URL and the address starting with "https" instead of "http". This not only secures the connection but also boosts user trust and confidence, crucial for any online business.
Register.lk provides free SSL with all their shared hosting packages. You may also visit this link to purchase a premium SSL if you need additional security for your website (recommended for E-commerce, Financial, Government Websites, and websites with Payment Gateways).
Today, we'll discuss the process of installing a Premium SSL certificate on your .LK domain using your Register.lk account.
Step 1: Log in to your Register.lk host cPanel
Step 2: Go to SSL/TLS Step 3: Click on 'Generate, view, or delete SSL certificate signing requests', under Certificate Signing Requests (CSR)
 Step 4: Fill the required fields using your domain name and Company details
-----END CERTIFICATE REQUEST-----
2. After copying the CSR code, navigate to your Register.lk account, then go to Services > My Services.


")


By following these steps, you have successfully installed a premium SSL certificate on your .LK domain through Register.lk, significantly enhancing your website's security and ensuring the protection of your users' sensitive information. This process not only secures data transmissions but also instills trust and confidence in your visitors, which is crucial for maintaining a reputable and professional online presence. With your SSL certificate in place, your website is now better equipped to handle the demands of today's digital landscape, providing a safe and secure environment for all interactions.
Register.lk provides free SSL with all their shared hosting packages. You may also visit this link to purchase a premium SSL if you need additional security for your website (recommended for E-commerce, Financial, Government Websites, and websites with Payment Gateways).
Today, we'll discuss the process of installing a Premium SSL certificate on your .LK domain using your Register.lk account.
1. The first step in generating your SSL certificate is to create a CSR (Certificate Signing Request). If your domain is hosted with Register.lk, you can follow the steps below to generate the CSR.
(If you do not have a hosting package with Register.lk, please contact your hosting provider for assistance.)Step 1: Log in to your Register.lk host cPanel
Step 2: Go to SSL/TLS
Step 3: Click on 'Generate, view, or delete SSL certificate signing requests', under Certificate Signing Requests (CSR)
Step 4: Fill the required fields using your domain name and Company details
- Key: Always use Generate a new "RSA, 2,048-bit" key
- Domains: Enter your naked domain and www.domain one below the other
- Ex: example.lk www.example.lk
- City: Enter the city name of your organization
- State: Enter the state of your organization
- Country: Select the Country of the organization
- Company: Enter your organization name
- Other fields are optional, and you may fill them if necessary
- Once completed click on Generate button
- On the next page, you'll need to copy the generated CSR code, including the lines mentioned below
(Please note it is not required to enter www.subdomainname if you are generating the SSL for a subdomain)


-----END CERTIFICATE REQUEST-----
2. After copying the CSR code, navigate to your Register.lk account, then go to Services > My Services.
Then click on the green 'Active' button of the SSL service.
3. Next, click on the 'Generate Now' button
4. Paste the copied CSR code into the Input CSR:* field. You should see the CSR details displayed as shown in the image below
5. Scroll down and fill the details as below
- Select Your Web Server:* Choose the web server based on your hosting package. For instance, select 'cPanel' for Register.lk shared hosting packages. If you're using a third-party hosting provider, contact them to confirm the hosting panel type. If unsure, you can select 'Other'.
- Signature Algorithm:* Select 'PREFER_SHA2'
- Site Administrator Contact Information: Enter the details of your IT admin or any other related person
- Technical Contact Information: Enter the details of technical person responsible, or you may select 'Same As Administrator Contact?' to copy 'Site Administrator Contact Information'
6. Once filled click on 'Click to Continue>>'
7. In next page we need to complete the domain ownership verification.
8. Comodo and Rapid provide 3 methods to verify domain ownership.
- Email Verification: An email will be sent to admin@yourdomain with a verification link. The user must click on the link to complete the verification.
- File Based Verification: You will be provided with a file to upload to your server in a specific path. The commonly used path is 'http://yourdomain/.well-known/pki-validation/uploadedfilename'. The download link for the file and the upload path will be provided on the next page if this verification method is selected.
- DNS verification: You will receive a DNS record that needs to be updated in your Domain or Hosting DNS panel. The specific DNS record details will be provided on the next page if this verification method is selected (For Comodo SSL a Cname record is provided and for Rapid SSL a TXT record).
(In our example we have selected DNS method to complete the verification)
9. After updating the DNS record, it can take up to 30 minutes to 1 hour for the DNS propagation to complete (duration may vary depending on your DNS provider), and for the SSL certificate to be issued. Both File upload and DNS methods may require some time to complete. The fastest method is the email verification method, where the SSL certificate will be issued within a few minutes after clicking the verification link in the email.
10. Once the verification process is completed, scroll down on the SSL page and click on the "Download Certificate" button to download the SSL certificate.
11. The downloaded file contains the SSL certificates that need to be installed on the hosting platform (in cPanel as per our example). Some servers may require the SSL certificate format to be converted. If you need assistance with converting the SSL format, please contact our support team.
12. Comodo SSL certificates typically include 5 files inside the 'CER - CRT Files' folder, while Rapid SSL certificates generally have 2 files. To ensure proper operation across all browsers, it is necessary to upload all these files to the server.
Let's proceed to install the SSL certificates in the cPanel.
13. Go to cPanel > SSL/TLS
14. Select 'Generate, view, upload, or delete SSL certificates.' Under 'Certificates (CRT)'
15. Click on 'Browse...' under 'Choose a certificate file (*.crt).' and select the SSL file (only a single file can be selected at a time).
16. Click on Upload Certificate to upload the file. The same step needs to be repeated to upload all the files to the server.
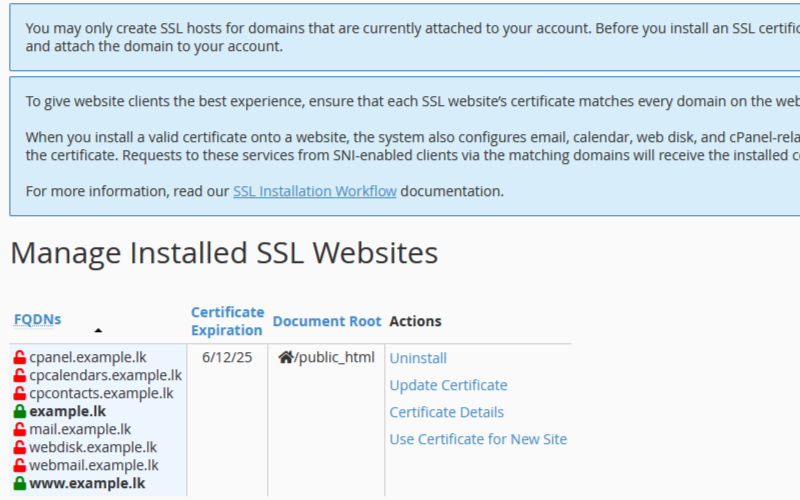
17. After uploading all the files, scroll back to the top of the same page and click on the 'Install' button located next to the relevant certificate.
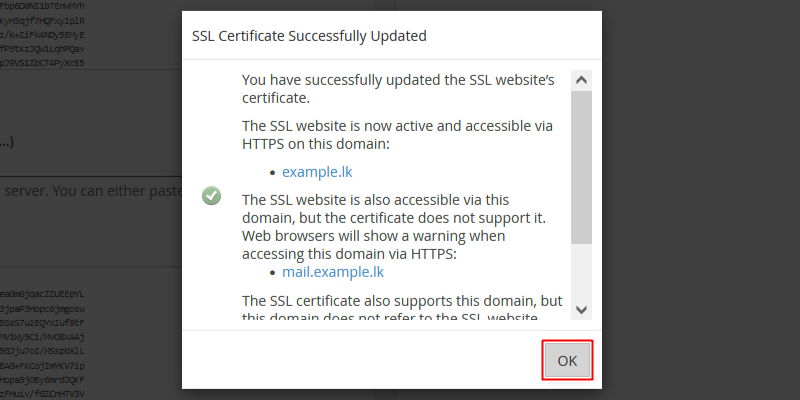
18. On the next page scroll down and click on 'Install Certificate' and then click on 'OK.'
Congratulations! You have successfully installed the premium SSL certificate for your domain.
By following these steps, you have successfully installed a premium SSL certificate on your .LK domain through Register.lk, significantly enhancing your website's security and ensuring the protection of your users' sensitive information. This process not only secures data transmissions but also instills trust and confidence in your visitors, which is crucial for maintaining a reputable and professional online presence. With your SSL certificate in place, your website is now better equipped to handle the demands of today's digital landscape, providing a safe and secure environment for all interactions.
If you encounter any issues or need further assistance, don't hesitate to reach out to the Register.lk support team for help.
 Written by: Register.lk Support Hero - Richie
 28-May-2026
 26-May-2026
 05-May-2026
Safe & Secure Payments Accepted via:


