
Live Chat

Domain Scan

(empty)

Login
How to Optimize Your Website by Storing Images on AWS
(01-Feb-2025)

Website speed is a crucial factor in providing an excellent user experience and improving your search engine rankings. One of the major contributors to website slowness is large image files. Storing images directly on your web server, especially if you're using shared hosting, can have a significant impact on your website's performance. In this article, we'll explore how you can optimize your website by storing your images on AWS (Amazon Web Services) S3 and why this is a smart choice for improving your site's speed.
Limitations of Storing Images on Shared Hosting
Shared hosting packages often come with their limitations. One of the biggest drawbacks is the limited storage allocated to each user. As your website grows and you add more images, you may quickly find that your storage limits are being reached.When too many images are stored on a shared hosting server, the impact can be significant. The more images you upload, the more storage space and bandwidth your server consumes, which can result in slower load times for your website.
The Impact of Storing Images on a Shared Hosting Server
Storing images on a shared hosting server can result in several issues that can harm your website's performance:- Slower Load Times: Large image files, especially high-resolution ones, can significantly slow down your website's load time. Studies have shown that a delay of even one second can lead to a drop in conversion rates and higher bounce rates. In addition, Google considers page load speed when ranking websites, so slow load times can negatively impact your SEO rankings.
- Overloading the Server: If your website uses up too many resources, such as storage space and bandwidth, your hosting provider may throttle your connection or even suspend your account temporarily. This can lead to your website becoming slow or completely inaccessible.
- Limited Scalability: As your website grows, so do your storage needs. With shared hosting, you're limited to the image storage and resources allocated to your account. This means that as your website expands, your hosting package may struggle to keep up with the demand.
Why You Should Use External Storage for Your Images
Storing your images on external storage, such as AWS S3, can provide several benefits:- Faster Load Times: External storage services like AWS S3 come with integrated Content Delivery Networks (CDNs) such as AWS CloudFront. A CDN helps to deliver your content from servers located closer to your users, reducing latency and speeding up image delivery across the globe.
- Scalability: External storage is easily scalable, meaning you can increase your storage capacity as your website grows. You no longer need to worry about running out of space or overloading your server as your site's image library expands.
- Reduced Hosting Load: By offloading your images to an external storage solution like AWS S3, you're freeing up resources on your shared hosting server. This allows your hosting server to focus on serving your website's HTML, CSS, and JavaScript, leading to faster page load times.
What is AWS and Why Use AWS S3 Bucket?
Amazon Web Services (AWS) is a cloud computing platform that offers a wide range of cloud-based services. One of the most popular services provided by AWS is S3 (Simple Storage Service), which is an object storage service designed for storing and retrieving large amounts of data.There are several reasons why you should use AWS S3 for storing your images:
- Reliability: AWS S3 offers 99.99% uptime and is designed to handle large amounts of data while ensuring it's always accessible.
- Scalability: With S3, you only pay for the storage you use, and the service can easily scale to accommodate your growing needs.
- Security: AWS S3 provides robust security features, including customizable access permissions, encryption, and backup options, to ensure that your images are safely stored.
- Integration with CDNs: AWS S3 integrates seamlessly with AWS CloudFront, a CDN that accelerates image delivery by caching your images at multiple edge locations around the world.
Steps to Create an AWS S3 Bucket
Creating an S3 bucket is a simple process. Follow these steps to set up your own bucket for storing images:- Sign in to AWS: Go to the AWS Management Console and log in to your account.
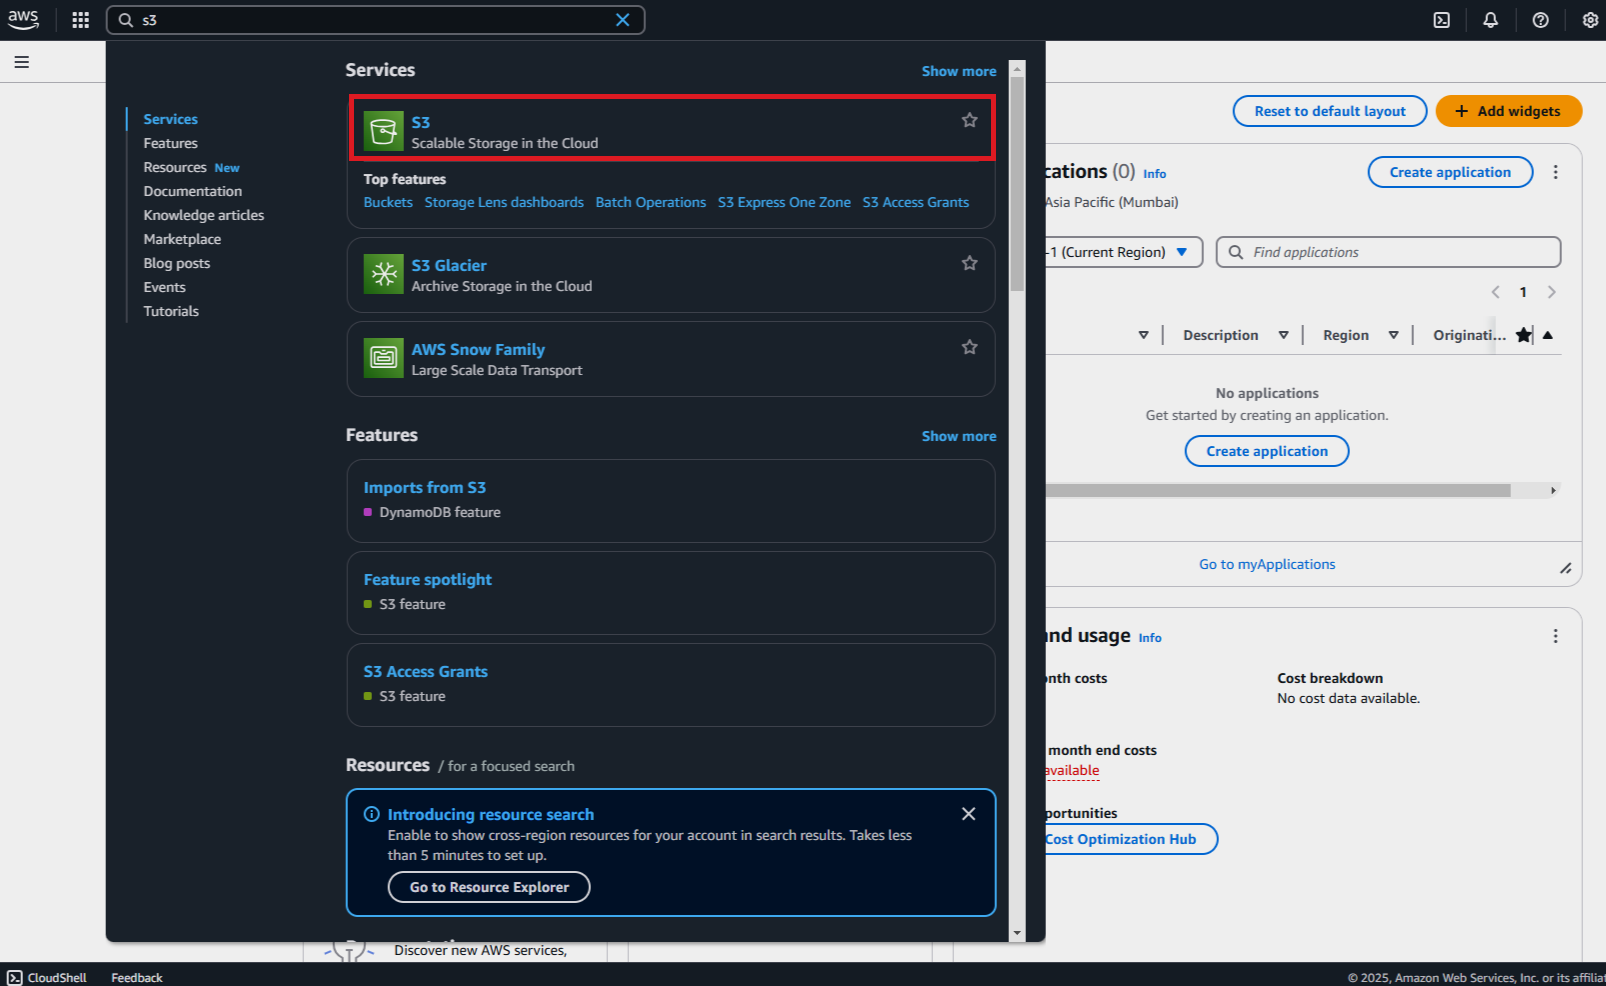
- Navigate to S3: In the search bar, type "S3" and select the S3 service from the dropdown menu.
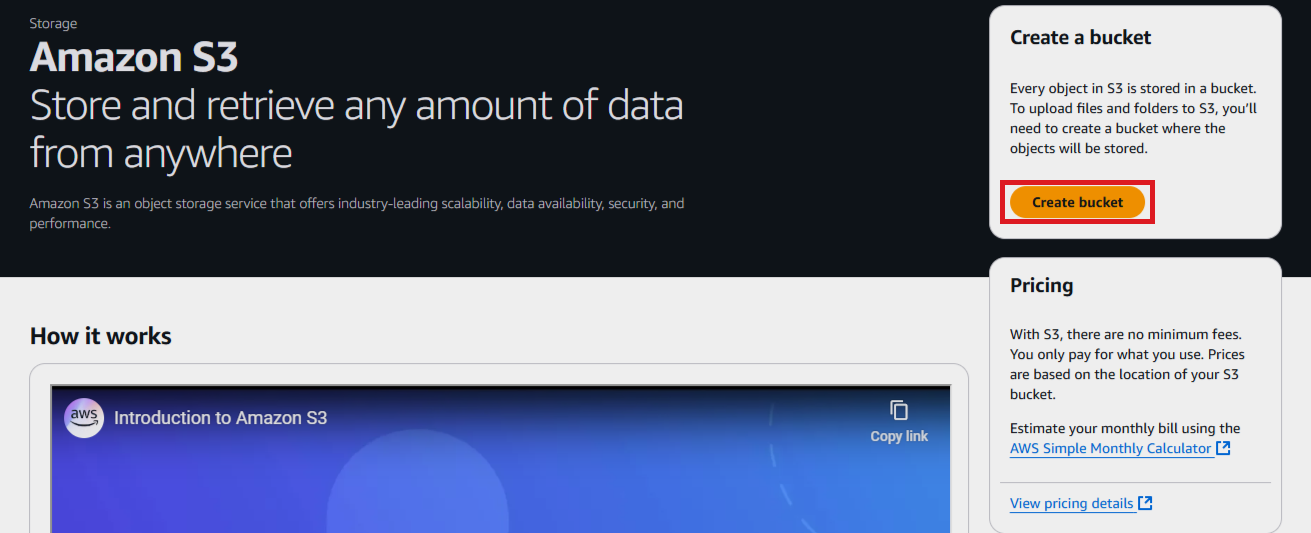
- Create a Bucket: Click the "Create Bucket" button to start the process.
- Give a Unique Bucket Name: Enter a unique name for your bucket. This name must be globally unique, so you may need to try several variations.
- Object Ownership: Set ACLs (Access Control Lists) to enabled.
-
Block Public Access Settings for this Bucket:
- By default, "Block all public access" will be ticked. Untick this field, and a warning will appear with a checkbox to make your bucket public.
- Click the checkbox to confirm and make your bucket public.

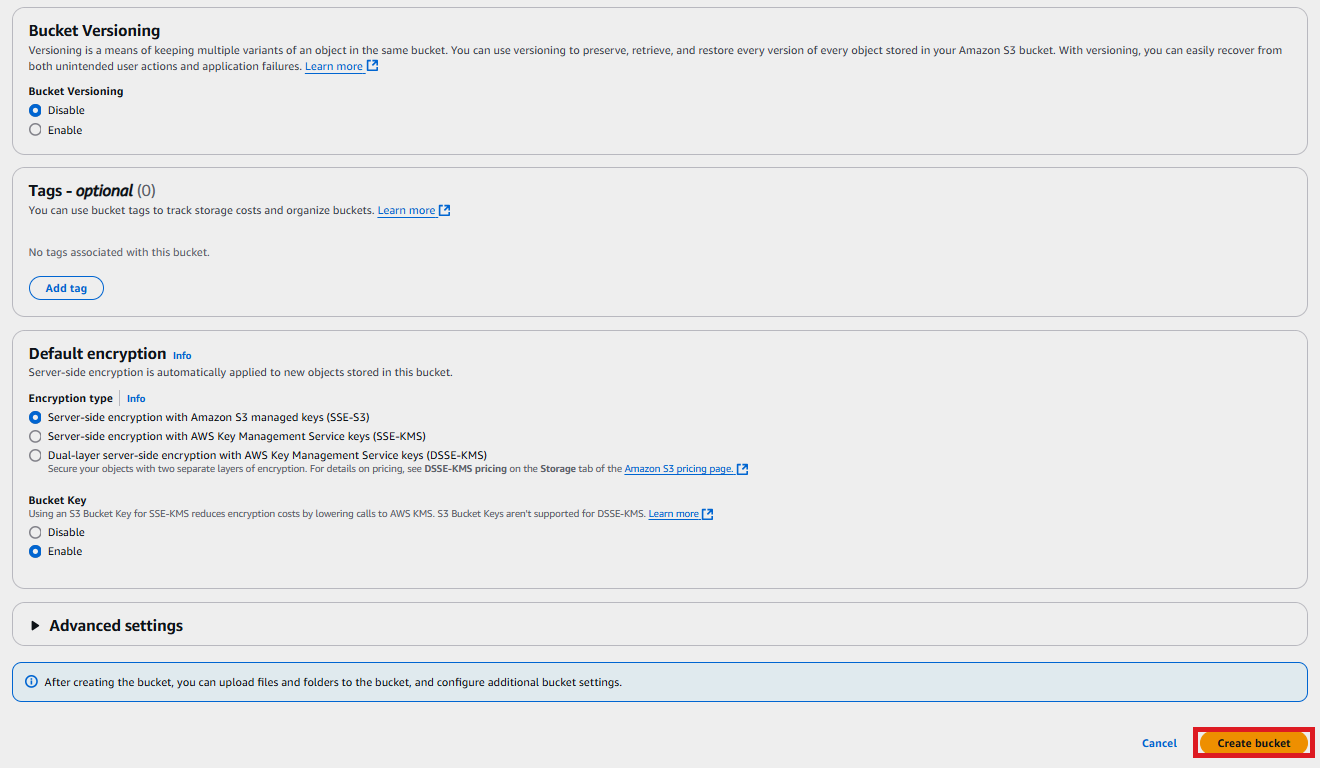
- Keep Other Settings with Default Values: Leave the rest of the settings as they are by default.
- Create the Bucket: Once you've configured your settings, click "Create" to finalize the creation of your bucket.


Steps to Upload Image Files to the Bucket with Public Access
Now that your S3 bucket is set up, it's time to upload your images. Here's how you can do it:- Go to Your Bucket: In the S3 dashboard, click on the bucket you just created.
- Upload Your Files: Click on the "Upload" button, and the upload page will appear. Click "Add files" to add your image files to the bucket. Once you have selected the image files, click the "Upload" button to upload them to the bucket.
- Verify the Upload: Check if the uploaded image files appear under the "Files and Folders" section.
-
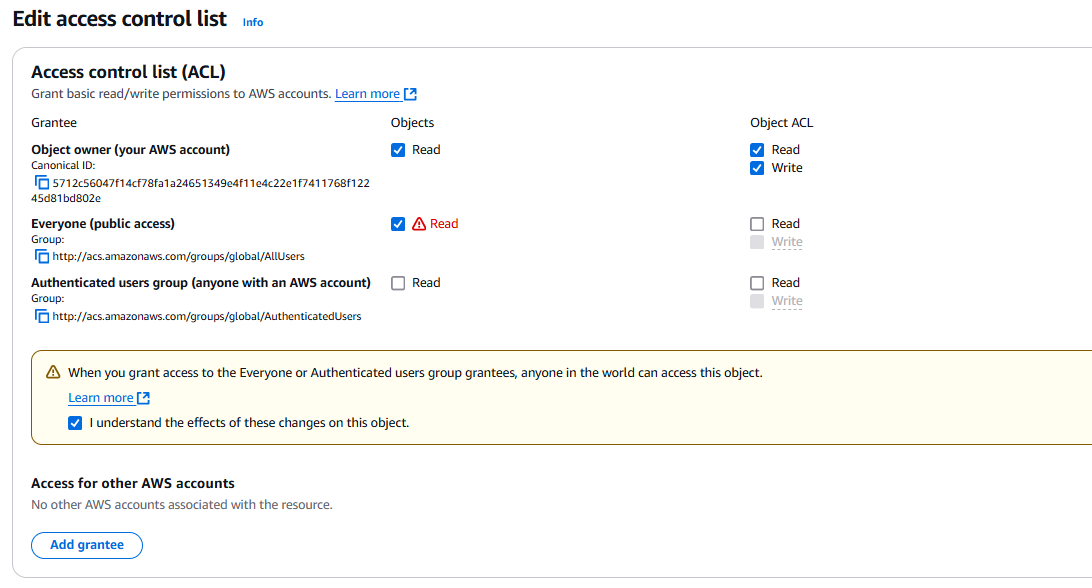
Set Permissions:
- Click on the image file.
- Under the "Permissions" section, click the edit button.
- Check the "Objects" box in front of "Everyone (public access)" to make the image public.
- This ensures that anyone with the link can view the image.
- Click "Save changes" to update the permissions.

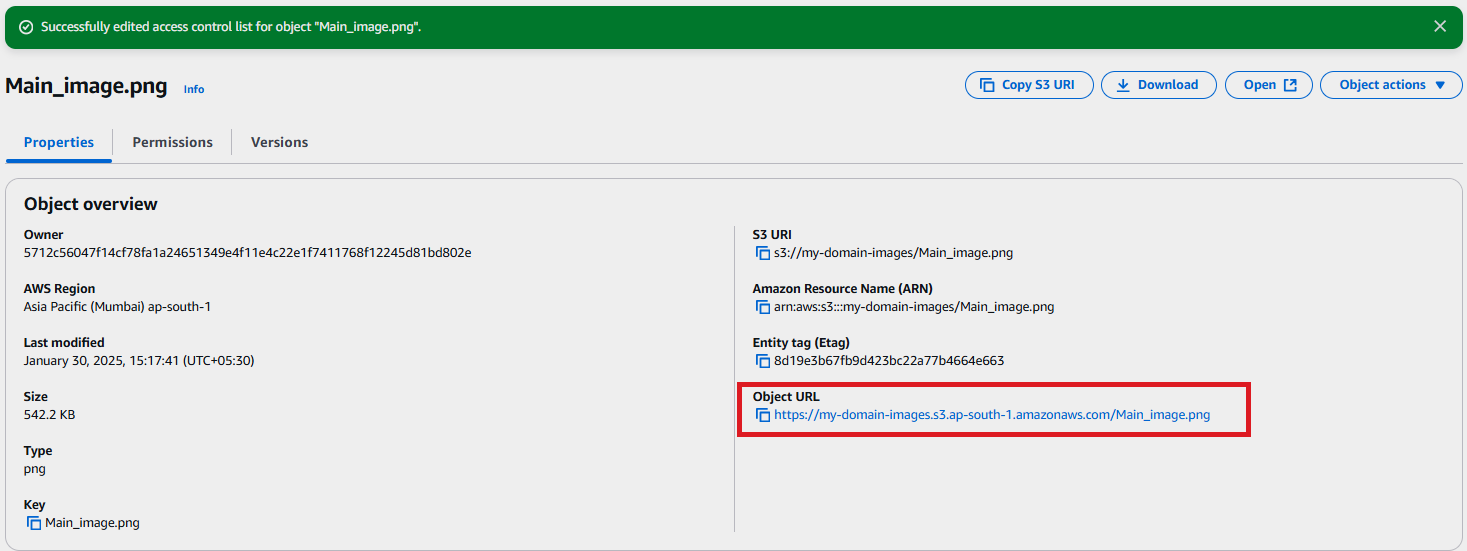
- Check the Image: Under "Properties," copy the Object URL and paste it into a browser. If the image loads successfully, your upload is complete.


How to Use the Link in Your Website
After uploading your images to AWS S3, you'll want to display them on your website. To do this:- Get the Image URL: In your S3 bucket, select the image you want to display. You'll see an "Object URL" field with the direct URL to the image.
- Use the URL on Your Website: Use this URL in your website's image tags. By doing this, you'll be linking to the image stored in your AWS S3 bucket, ensuring faster load times for your visitors.
Conclusion
Storing your website's images on AWS S3 is an effective way to optimize your website's performance. It helps to reduce the load on your shared hosting server, improve page load speeds, and provide scalable storage for your growing website. By using AWS S3, you can take advantage of a reliable, secure, and fast image storage solution that integrates seamlessly with a CDN for even faster delivery.By leveraging AWS S3 for image storage, you can enhance your website's performance, reduce server load, and ensure a seamless user experience. Start optimizing today and give your website the speed and scalability it deserves!
 Written by: Register.lk Support Hero - Shamendra


