
Live Chat

Domain Scan

(empty)

Login
How to Speed Up Your Website with LSCache
(17-aug-2024)

In today's fast-paced digital world, website speed is more critical than ever. Slow-loading pages can frustrate users, reduce engagement, and even impact your search engine rankings. One effective way to enhance your website's performance is by enabling LiteSpeed Cache (LSCache). This powerful caching solution helps reduce server load and delivers faster page load times, ensuring a smoother experience for your visitors. Whether you're using WordPress or a custom-built website, enabling LSCache is a straightforward process. To learn more about the benefits and potential issues of caching, you can refer to our previous blog. In this guide, we'll walk you through the steps to activate LSCache and optimize your website's speed.
Check if LSCache is Enabled
Before anything else, head over to check.lscache.io and enter your domain to see if LSCache is already enabled. If LSCache is enabled for your website, it will show as "LSCache is supported." If not, it will indicate that "LSCache is not supported."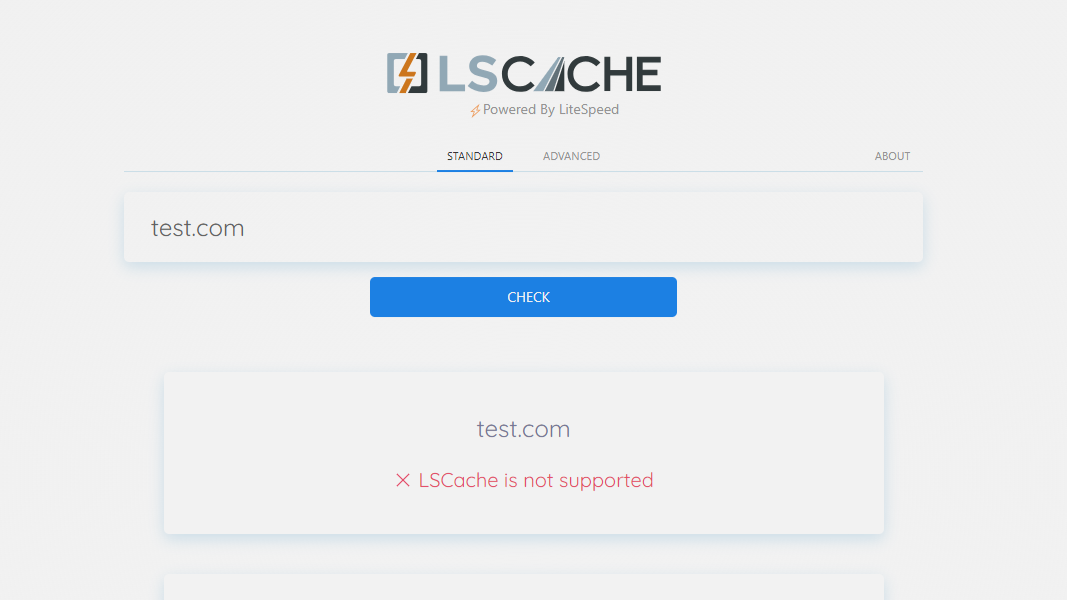
Enabling LSCache for Non-WordPress Websites
To manually enable LSCache on your website if it's not already enabled and you're not using WordPress, you'll need to make some updates to your .htaccess file. Here's how:- Locate the .htaccess file: You'll typically find this file in the root directory of your website. If you're using cPanel, you can navigate to the 'File Manager' and look for the .htaccess file there.
- For the main domain: The .htaccess file is usually located in the public_html directory.
- For a subdomain: You'll find the .htaccess file inside the folder corresponding to your subdomain, typically found within the public_html directory (e.g., public_html/subdomain_name).
- Edit the .htaccess file: Right-click on the .htaccess file and select 'Edit' to open it.
- Update the code: Copy and paste the provided code at the beginning of your .htaccess file.
- Save the changes: After updating the code, save the changes to the .htaccess file. This will enable LSCache and help optimize your website's performance.
<IfModule LiteSpeed>
RewriteEngine On
CacheDisable public /
RewriteCond %{REQUEST_METHOD} ^HEAD|GET$
RewriteCond %{ORG_REQ_URI} !/administrator
RewriteRule .* - [E=Cache-Control:max-age=120]
</IfModule>
RewriteEngine On
CacheDisable public /
RewriteCond %{REQUEST_METHOD} ^HEAD|GET$
RewriteCond %{ORG_REQ_URI} !/administrator
RewriteRule .* - [E=Cache-Control:max-age=120]
</IfModule>
Note: If your website has an admin panel, be sure to replace "administrator" with the correct path to your admin directory. If your website does not have an admin panel, you can leave "administrator" as it is.
Enabling LSCache for WordPress Websites
Enabling LSCache for your WordPress website is a simple process that can significantly improve your website's performance. Here's how you can do it:1. Log in to cPanel: Start by logging into your cPanel account, which is provided by your hosting provider.
2. Navigate to LiteSpeed Web Cache Manager: Once you're in the cPanel dashboard, locate and click on the "LiteSpeed Web Cache Manager" icon. This tool manages all the caching settings for your websites.
3. Go to WordPress Cache: In the LiteSpeed Web Cache Manager, click on "WordPress Cache" to access the LSCache settings specific to your WordPress installations.
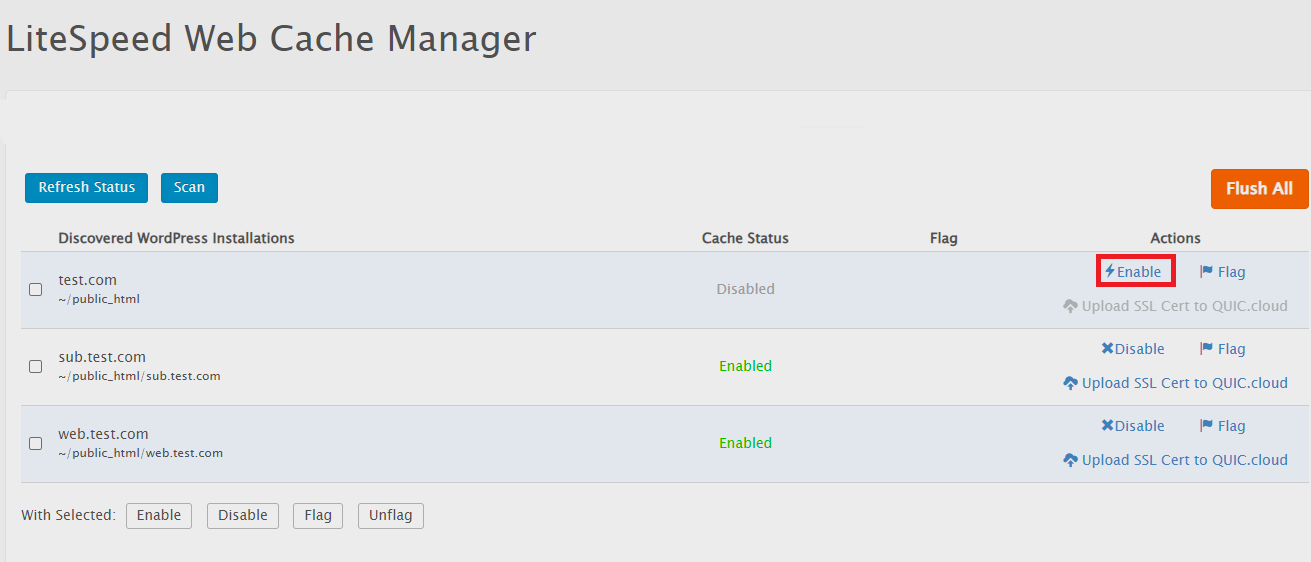
4. Scan for Available Installations: After entering the WordPress Cache section, click on the "Scan" button. This will initiate a scan to detect all WordPress installations on your server.
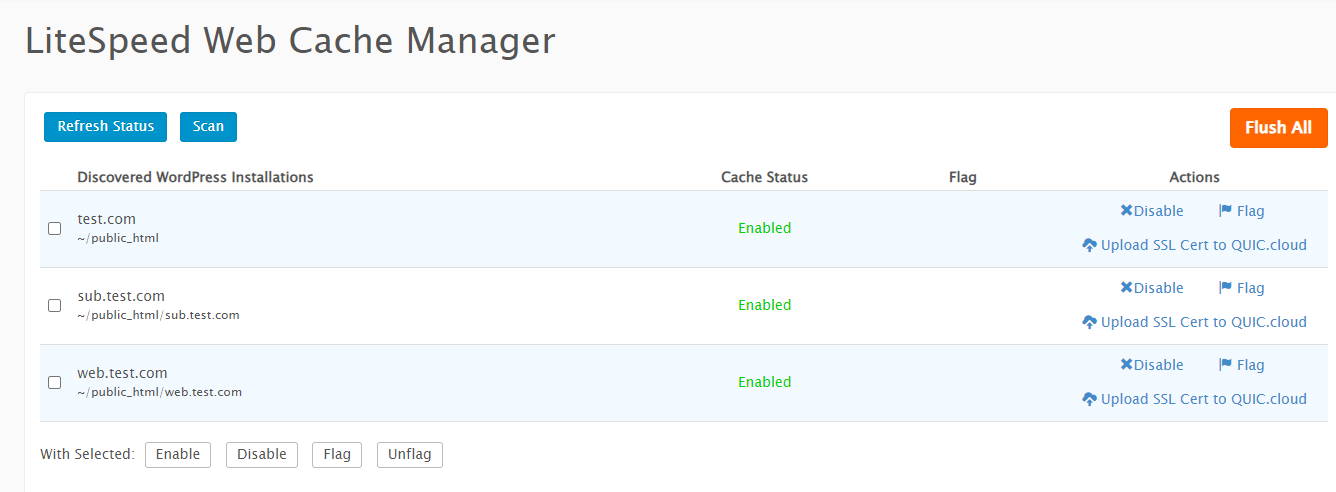
5. Check the LSCache Status: Once the scan is complete, you'll see a list of your WordPress installations along with the current status of LSCache for each website.
6. Enable LSCache: If LSCache is disabled for any of your WordPress websites, simply click the "Enable" button under the "Actions" column to activate it. This will turn on LSCache, optimizing your website for better speed and performance.
Troubleshooting Common LSCache Issues
Enabling LSCache on your WordPress website can significantly improve its speed and performance. However, you might run into some issues during the setup process. Here are some common problems and solutions to help you get LSCache up and running smoothly.1. Check wp-config.php File Permissions
One of the first things to check if LSCache isn't enabling correctly is the permissions of the wp-config.php file. This file is crucial for the configuration of your WordPress website. If you're receiving an error message like the one shown below, you can follow the steps outlined to resolve the issue.
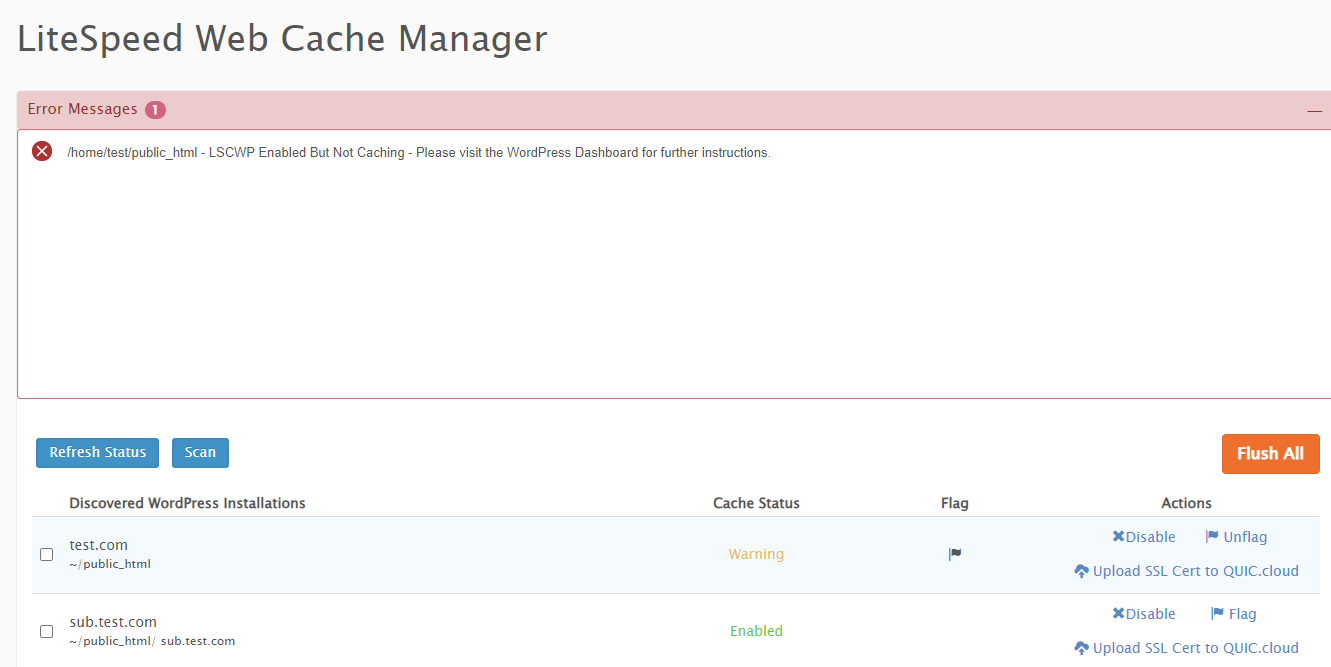
- Solution: Log in to your WordPress Dashboard. After logging in, check for any warnings related to file permissions. If you notice any, ensure that the permissions for the wp-config.php file are correctly set to 600. You can do this directly in cPanel by navigating to the File Manager. The wp-config.php file is typically located in the root directory of your WordPress installation.
- For the primary domain: The path is usually /public_html/wp-config.php.
- For a subdomain: The path will be something like /public_html/subdomain_folder/wp-config.php, where subdomain_folder is the specific folder assigned to your subdomain.
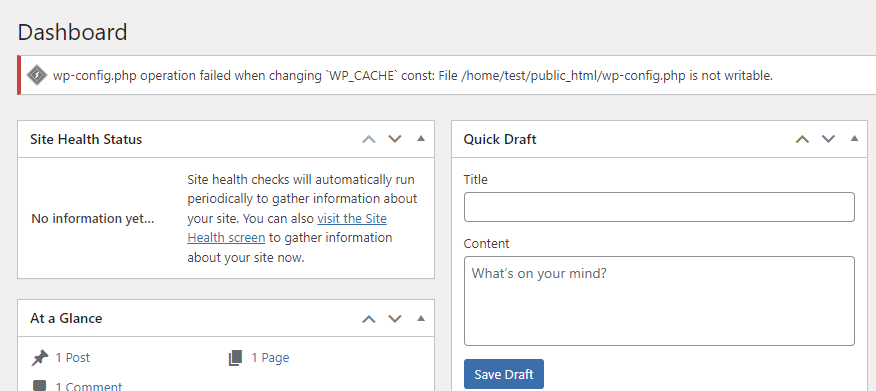
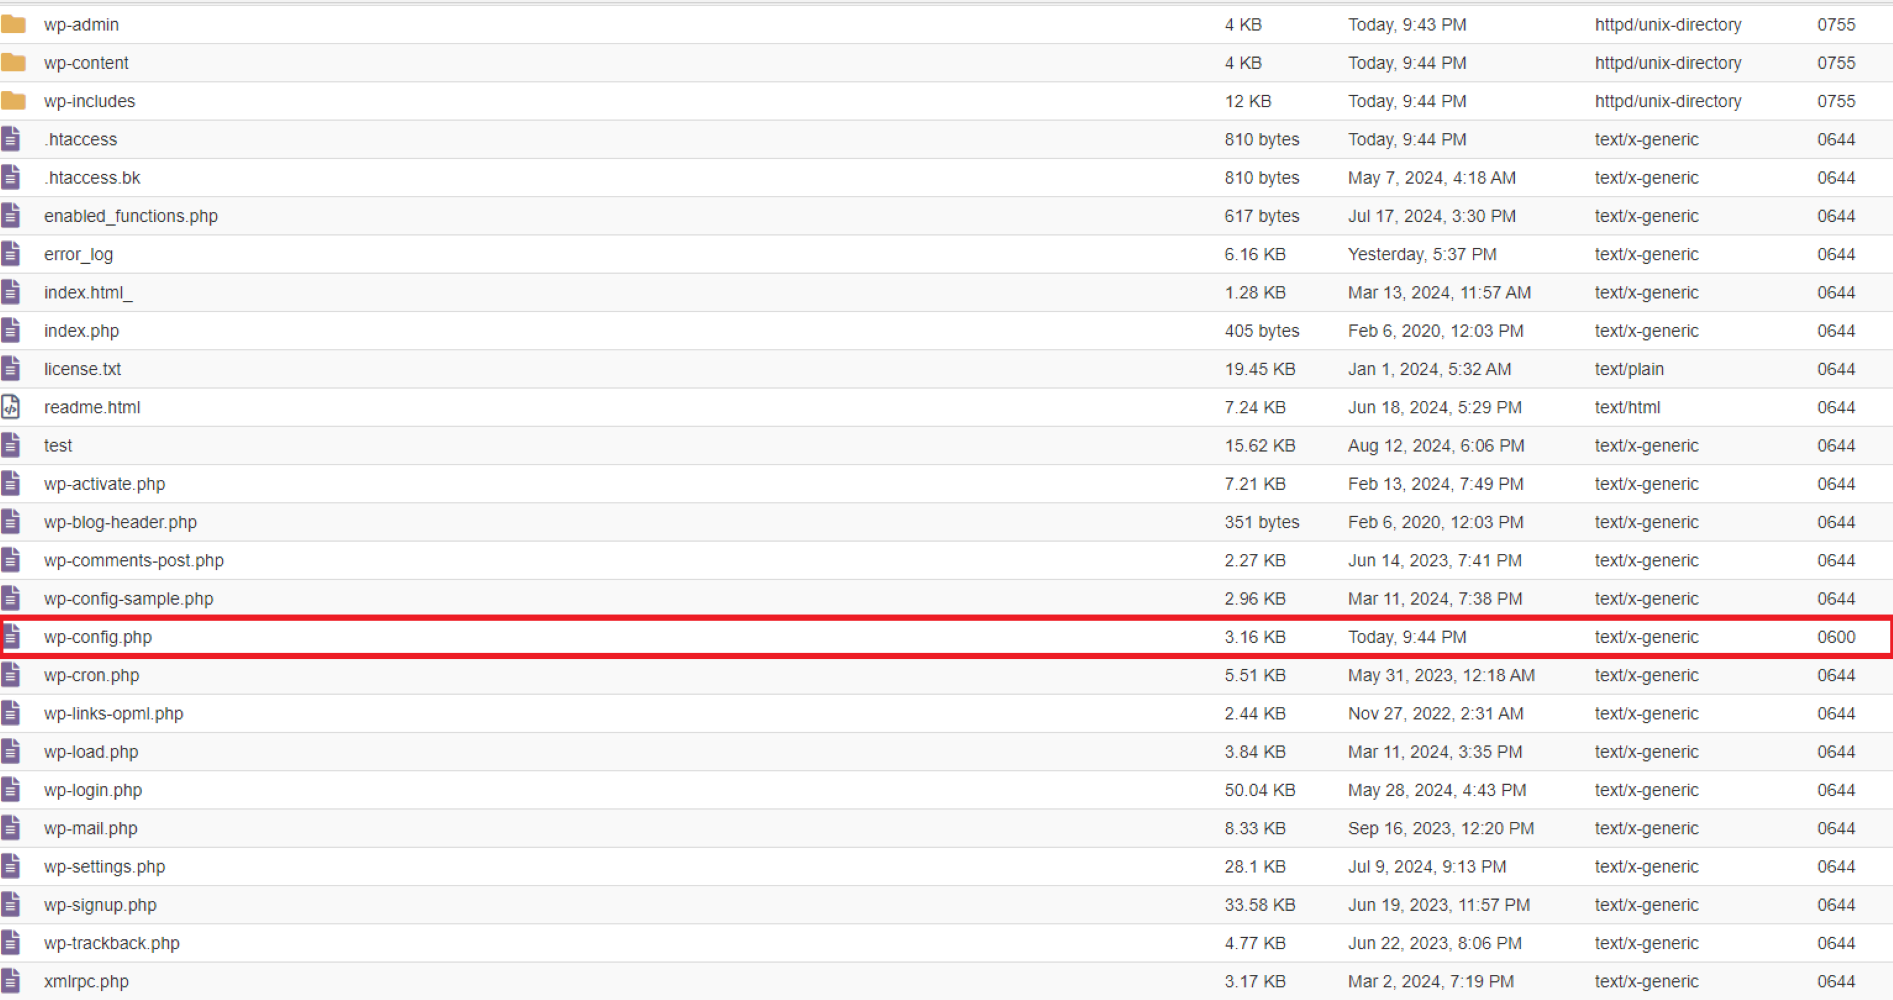 After adjusting the permissions, return to LSCache and click the "Enable" button. This should resolve the issue.
2. Conflicting Caching Plugins
A common issue arises when multiple caching plugins are installed on your WordPress website. LSCache can conflict with other caching plugins, causing errors or reduced performance. If you encounter an error message when enabling LSCache for your website like the one shown below, follow these steps to resolve the issue.
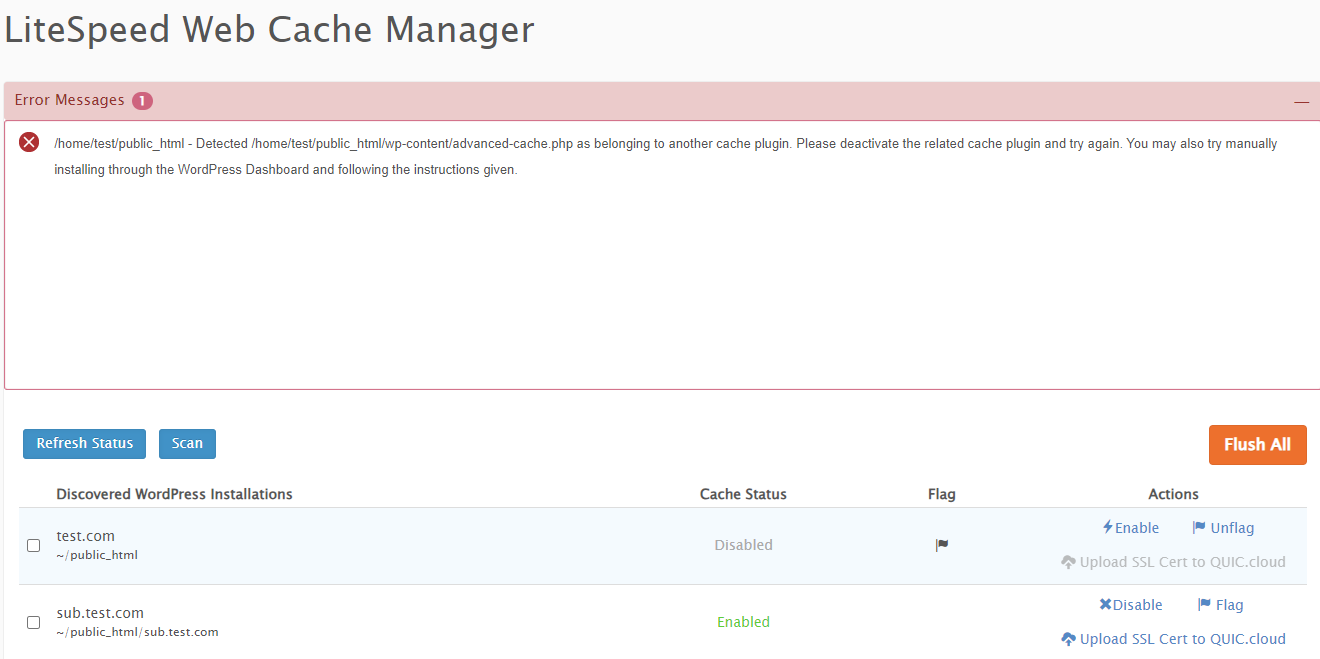
- Solution: To avoid conflicts, disable any other caching plugins you have installed on your website. You can do this by navigating to the Plugins section in your WordPress dashboard, deactivating the conflicting plugin(s), and then trying to enable LSCache again. Removing these conflicts should allow LSCache to function correctly.
Conclusion
By enabling LiteSpeed Cache, you're taking a significant step toward improving your website's performance and user experience. Whether you're managing a WordPress site or a custom platform, the process is simple and well worth the effort. A faster website not only keeps your visitors happy but also boosts your SEO performance and overall site efficiency. Remember to monitor your site's performance regularly and make adjustments as needed to keep things running smoothly. With LSCache activated, your website is well on its way to delivering top-notch speed and reliability.Take control of your website's speed today and enjoy the benefits of a faster, more responsive website with LiteSpeed Cache.
 Written by: Register.lk Support Hero - Shamendra


