Live Chat

Domain Scan

(empty)

Login
How to Use The WP Mail SMTP Plugin to Send Emails?
(27-jun-2024)

Email communication is a vital aspect of managing a WordPress website. Without proper configuration, emails can be unreliable and may end up in spam folders. Configuring Simple Mail Transfer Protocol (SMTP) ensures more reliable and secure email delivery. In this guide, we will walk you through the steps to configure SMTP for your domain in WordPress, using the WP Mail SMTP plugin.
Step-by-Step Configuration Guide
Step 1: Create an Email AddressFirst, you need to create an email address under your domain. To do this, follow these steps:
- Navigate to your cPanel and select Email Accounts.
- Click on Create and enter the desired email address (e.g., admin@yourdomain.com).
- Set a strong password for the email account and complete the creation process.
(You can check out our previous blog, "Set Up Email Accounts for Your Domain Using cPanel" for a detailed guide on creating professional email accounts in cPanel.)
Step 2: Install the WP Mail SMTP Plugin
Next, log in to your WordPress dashboard to install the necessary plugin:
- Go to Plugins > Add New.
- Search for "WP Mail SMTP" in the search bar.
- Install and activate the WP Mail SMTP plugin.
Step 3: Configure SMTP Settings
Once the plugin is activated, configure the SMTP settings as follows:
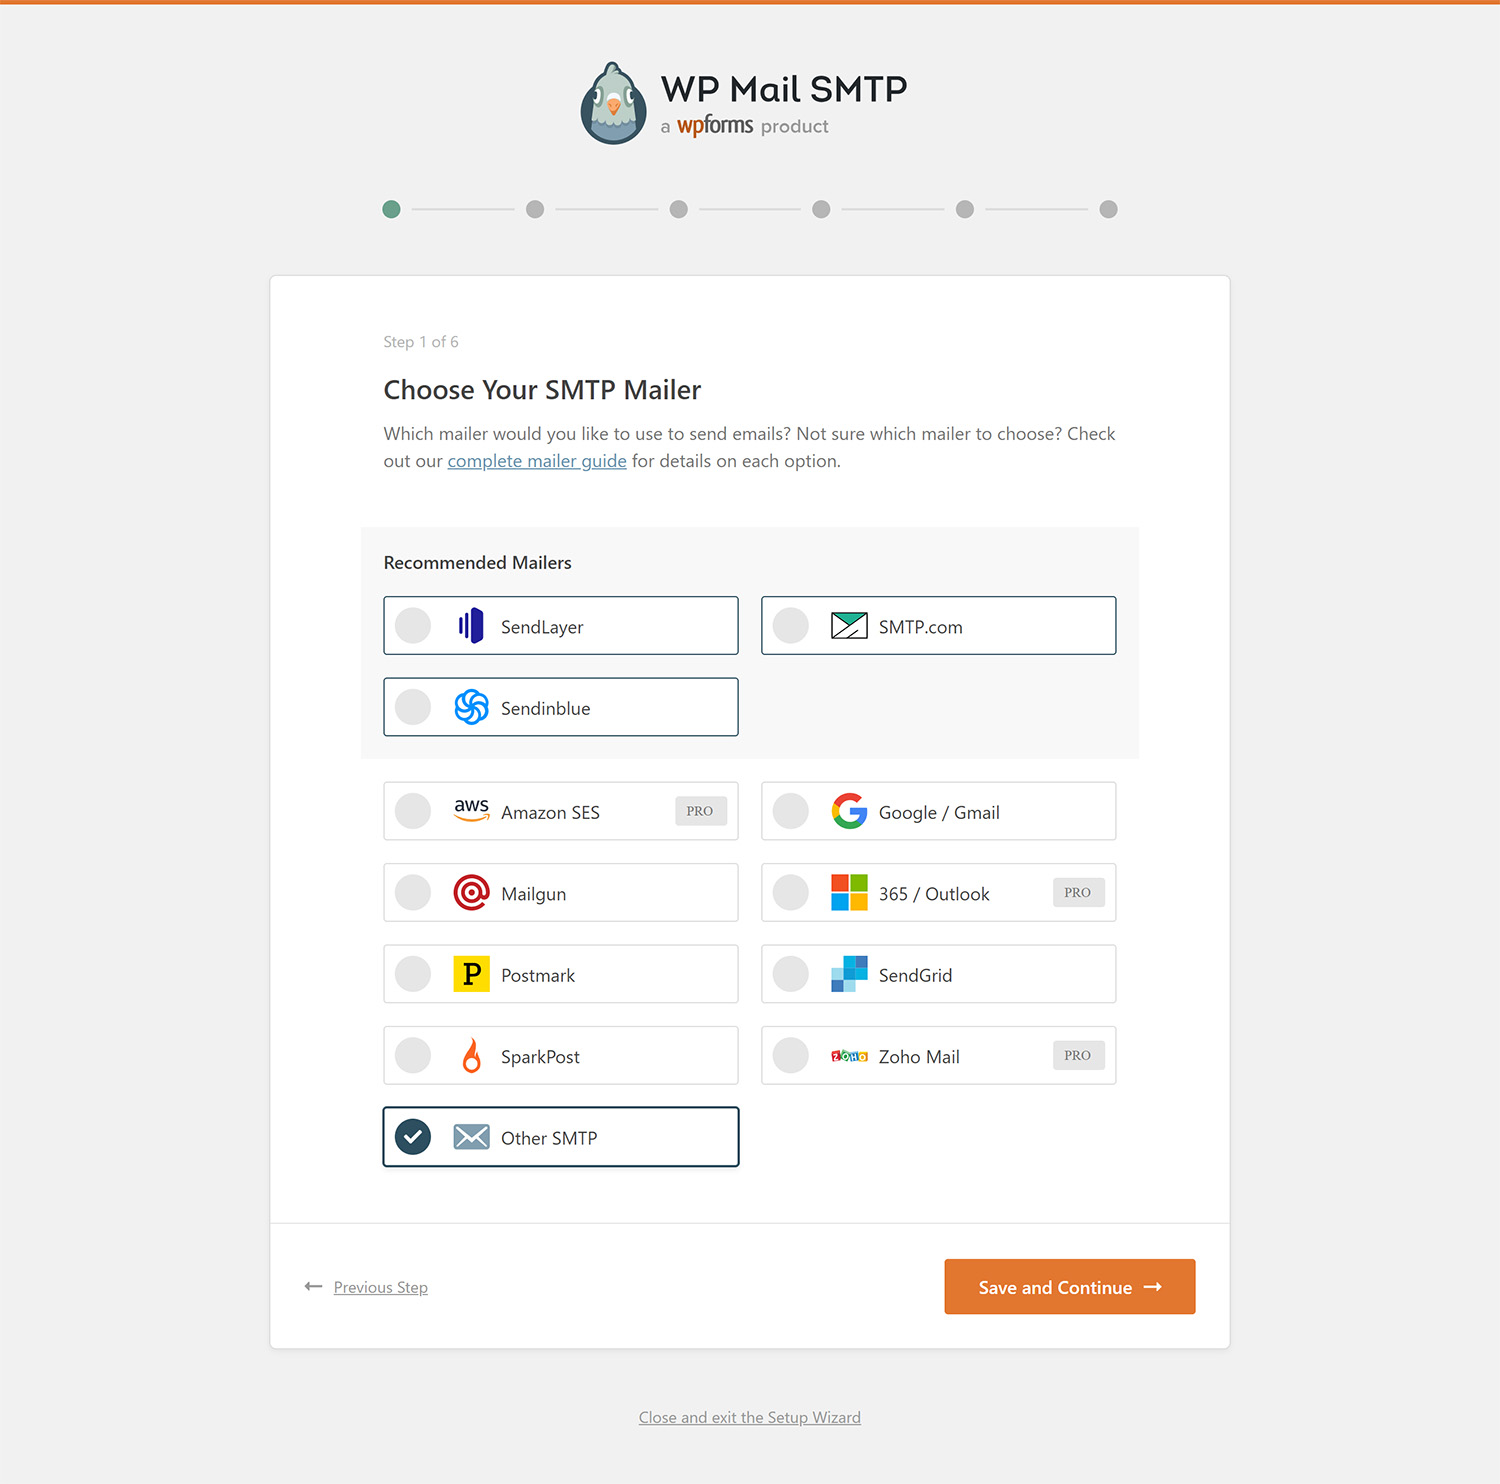
- Navigate to WP Mail SMTP in the WordPress dashboard menu.
- Under the Mail tab, select Other SMTP as your mailer.
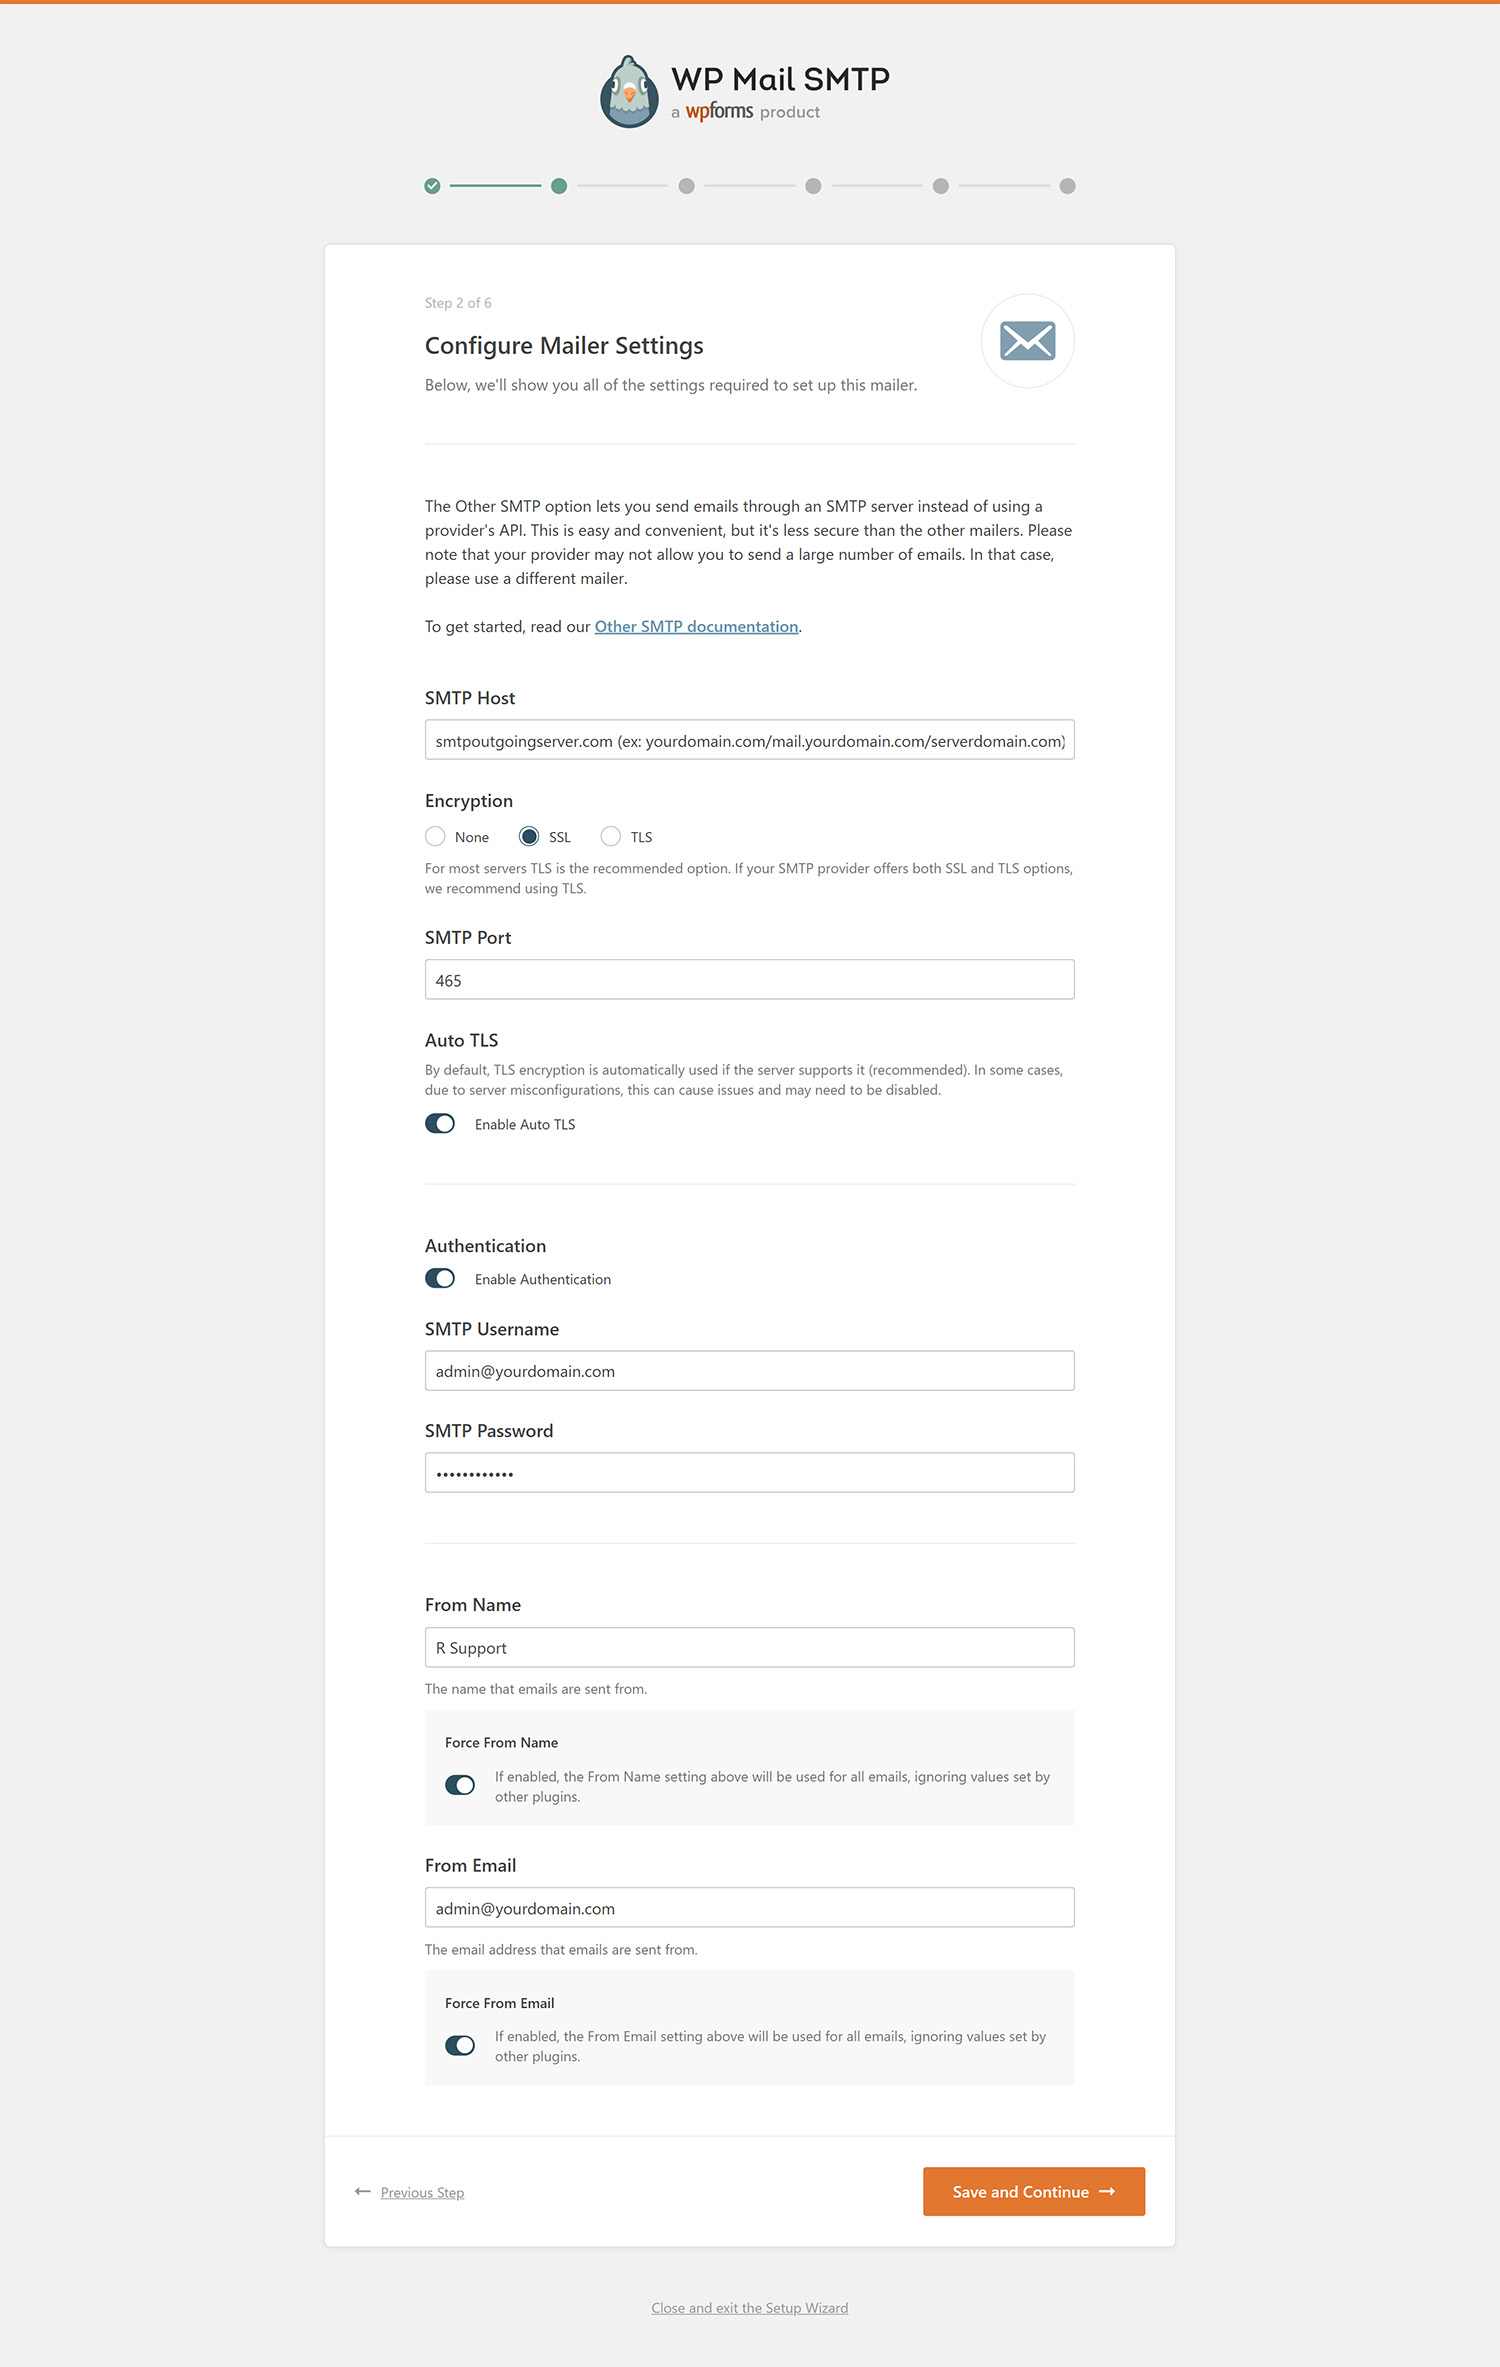
 Step 4: Enter SMTP Details
Fill in the required SMTP details:
 Step 5: Save Settings and Complete Setup
- Click Save and Continue to proceed to the next step.
- On the next screen, select Skip this Step when prompted for the WP Mail SMTP License Key.
- Finally, click Finish Setup to complete the configuration.
Conclusion
Configuring SMTP for your WordPress site ensures that your emails are delivered reliably and securely. By following these steps, you can set up an email address under your domain and configure the WP Mail SMTP plugin to handle your outgoing emails. This not only enhances the reliability of your email delivery but also improves the overall user experience for your website visitors.
Start configuring your WordPress SMTP settings today and enjoy hassle-free email communication!
 Written by: Register.lk Systems Hero - Lakshani


