


Live Chat

Domain Scan

(empty)

Login

Create a Stunning Website for Free - with Register.lk
(OR Upload Your Existing Website)
In the previous article we mentioned how to sign-up with Register.lk and how to purchase a domain + hosting. After you purchase a domain with hosting, let's see how you can upload your website to this domain or make a new website from this article.
First you need to login to the cPanel (Control Panel) which you will be able to carry out the task of an administrator in your website. In order to access the cPanel:
1. First login to Register.lk with your credentials.
2. Once you are logged in, click on the 'Hosting' menu item which is listed in the Top Menu.
3. When you click this, you will be displayed few more sub menu items. Click on the 'My Hosting' sub menu.
4. Then you will be displayed the products and services which you have subscribed with.
5. Click on the 'Active' button listed here, for the website for which you need to log into the control panel.
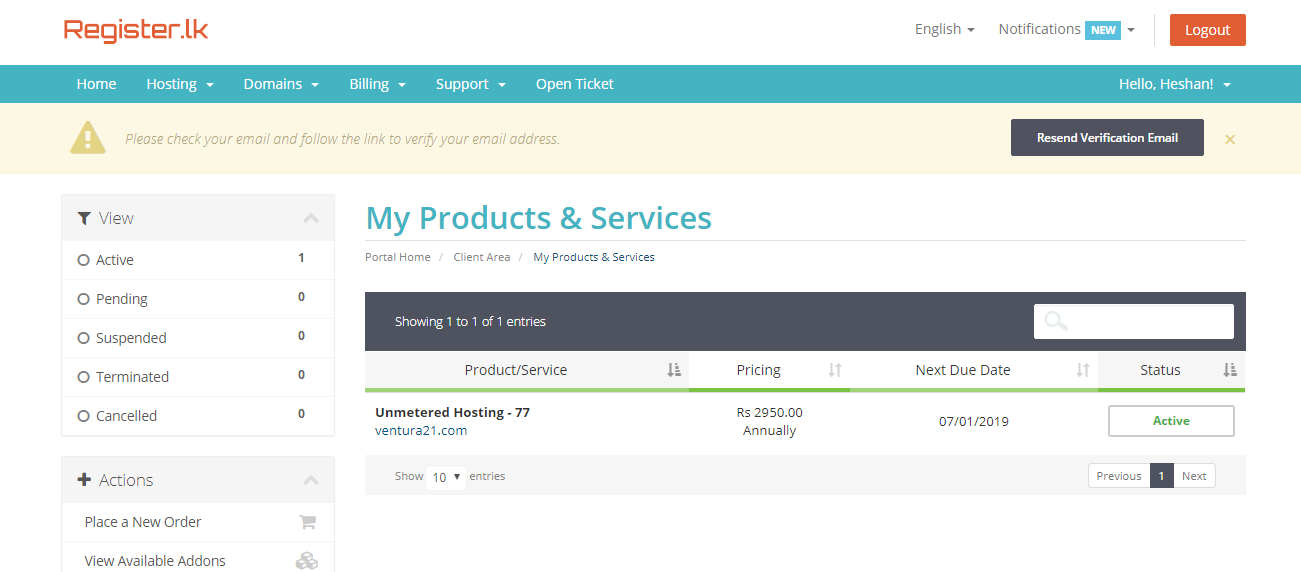
When you click on the 'Activate' button, you will be navigated to the relevant Product Details page.
Click on the 'Login to cPanel' menu item which is displayed in the left hand corner of the page in order to access the Control Panel.
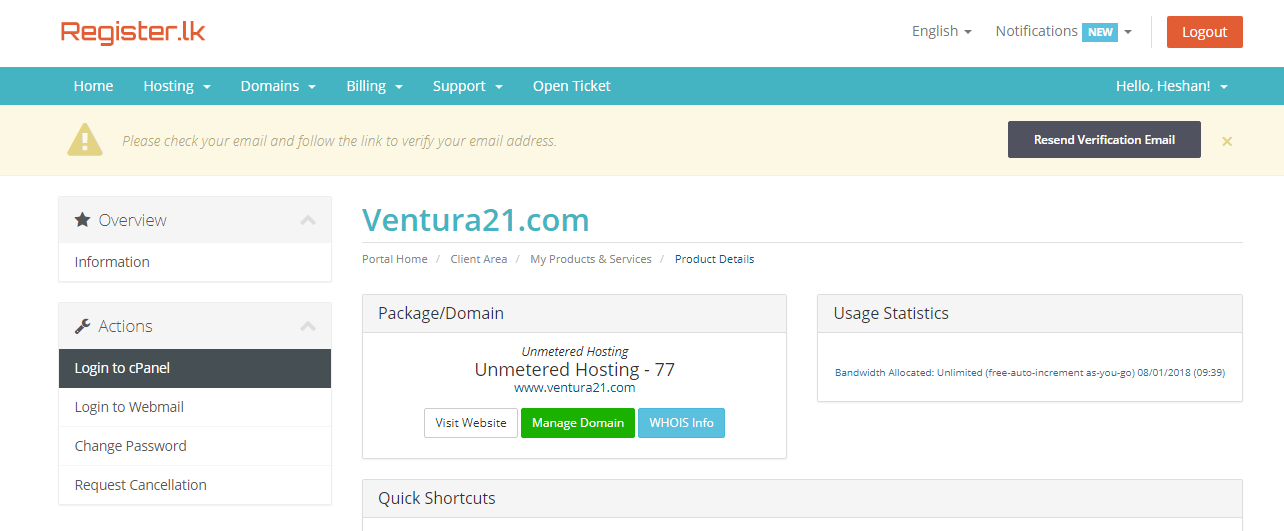
Now you will be navigated to the cPanel, which you will be able to see many configuration areas.
Now that you are in the Control Panel, let's get your website uploaded or made. Following are the two ways of uploading a website to the domain you purchased.
1. Via File Manager (if you already have a website)
2. Via Softaculous Apps Installer (make a new website using a theme)
1. Uploading your site via File Manager
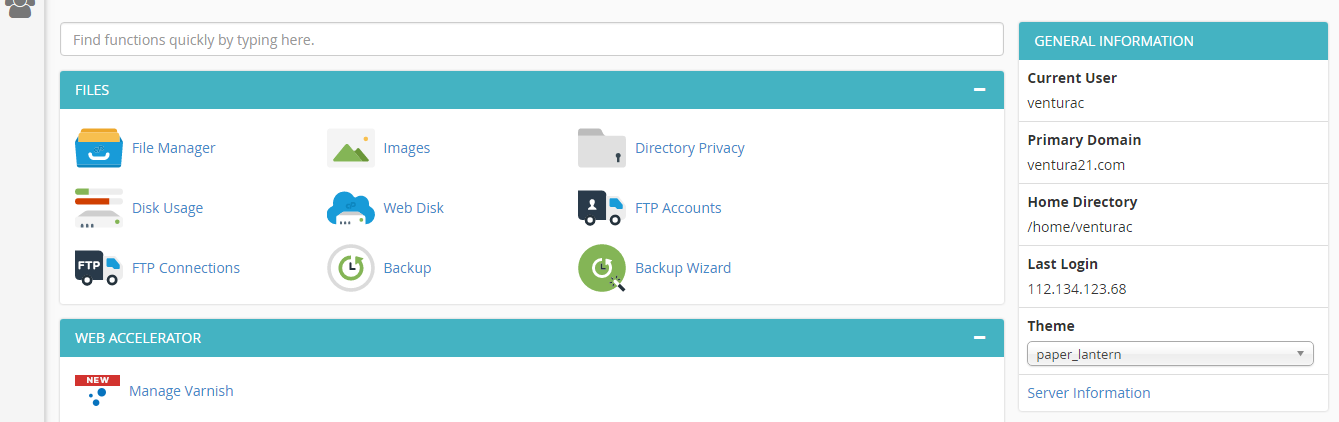
Step 1 - Click on the File Manager icon
The File Manager icon is located under the 'Files' section of the Control Panel page.
Once the File Manager icon is clicked, you will be navigated to the File Manager page.
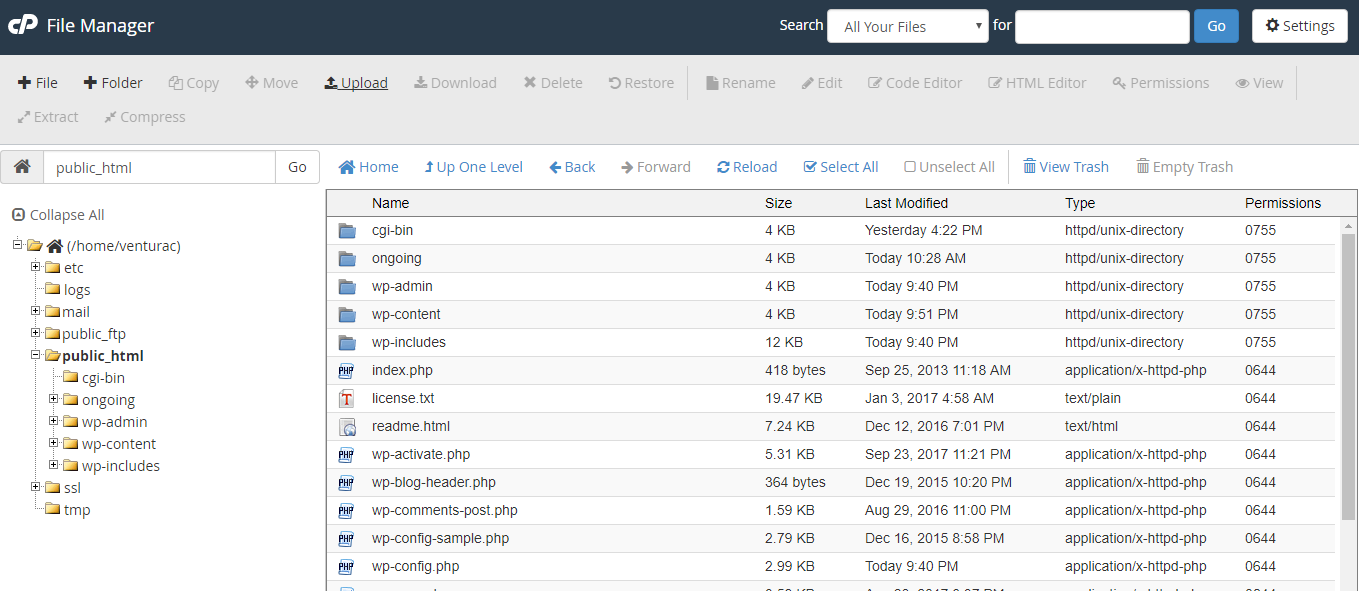
Step 2 - Upload your website files to the 'public_html' folder
Your website should be uploaded inside the 'public_html' folder.
Go inside this 'public_html' folder and select the 'Upload' button located on the top of the page to upload your web files. (Note that you should directly upload your website files under this 'public_html' folder. Not under any subfolders inside the 'public_html' folder.)
Once all the files are uploaded, close this page and run your website.
That's it! Yes, it was that easy!
2. Making a new website via Softaculous Apps Installer
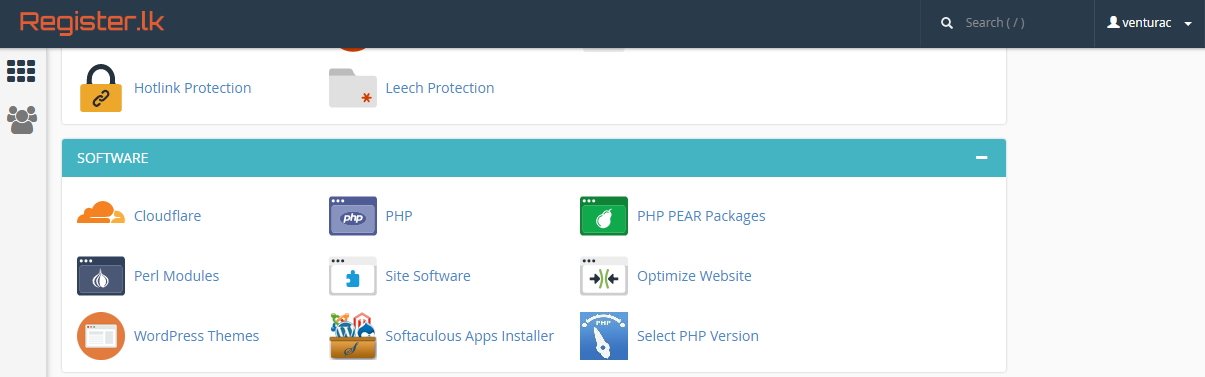
Step 1 - Click on the Softaculous Apps Installer icon
The Softaculous App Installer icon is located under the 'Software' section of the Control Panel page.
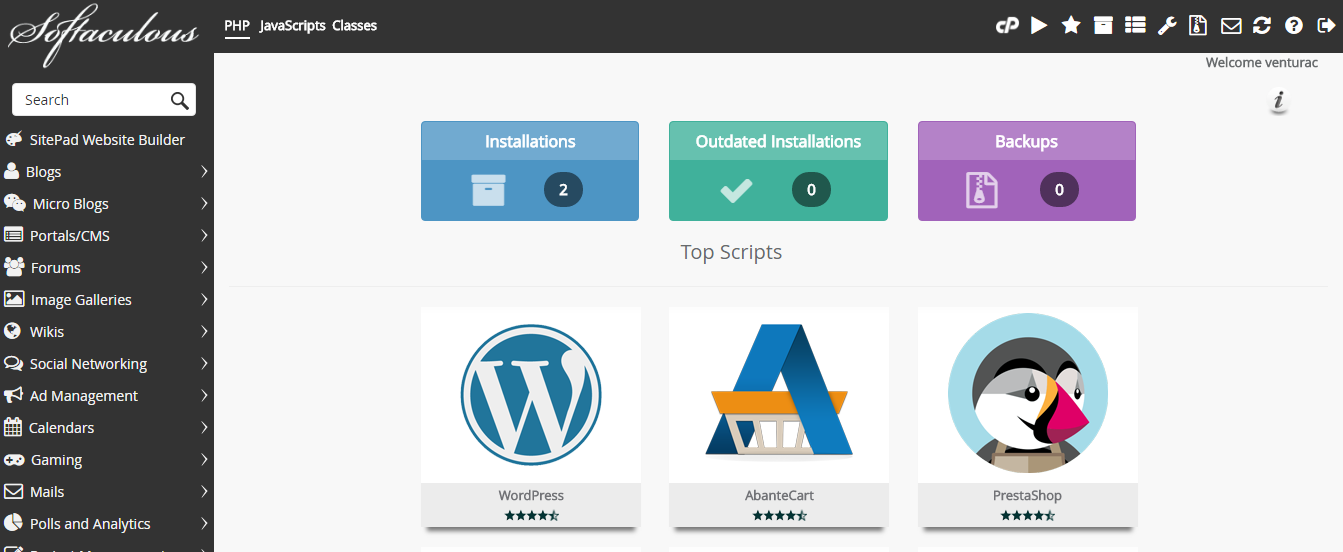
Once the Softaculous Apps Installer icon is clicked, you will be navigated to the Softaculous Apps Installer page.
Step 2 - Select the relevant Script Type of the website you want to upload
Out of the scripts displayed in the page you are navigated to, after clicking on the Softaculous Apps Installer, select the relevant script (Eg: I will select 'WordPress').
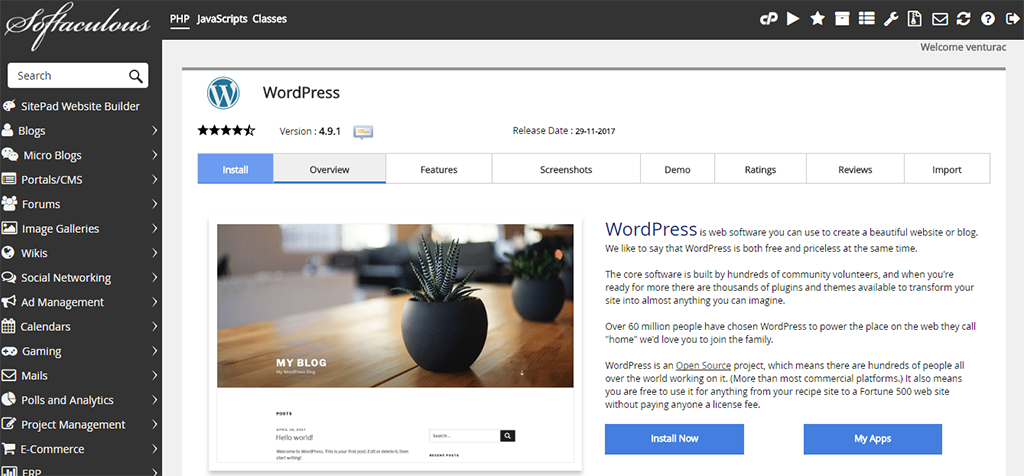
Once I click on a script, say 'WordPress', I will be navigated to the relevant script page.
Step 3 - Install
Click on the 'Install Now' button to install the website.
Step 4 - Setup details
Once you click on the 'Install Now' button, you will be displayed an overlay which you will need to enter the setup details.
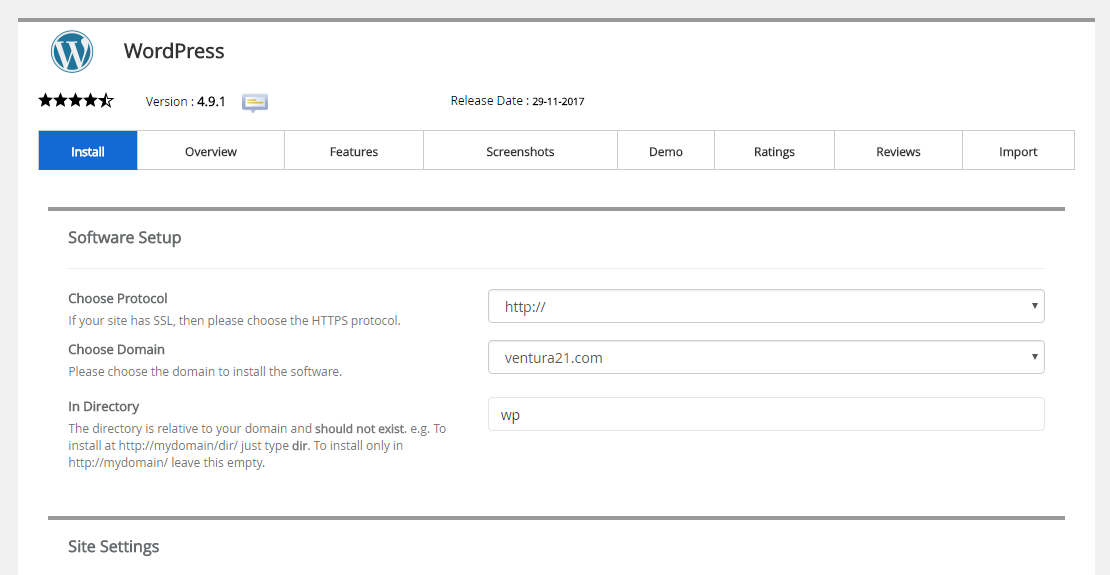
Under 'Software Setup', choose the Protocol you wish to provide to your website. If you do not have a SSL certificate in your website, leave it as 'http://'
Under 'Choose Domain' by default it will display the domain name you have provided. Keep it as it is.
The location which the wordpress site should be installed is given under 'In Directory' field. If you leave it as 'wp' the website will be installed inside the wp folder and will not display content when you run the website with the domain name you have given. Therefore, remove this 'wp' wording and leave the 'In Directory' field blank.
The Site Settings can be configured later. (Here you can configure the site name and the welcome description text in the site.)
Under the 'Admin Account' section you can change the Admin Username and the Password. We recommend you to keep the password as it is due to the auto generated password is strong.
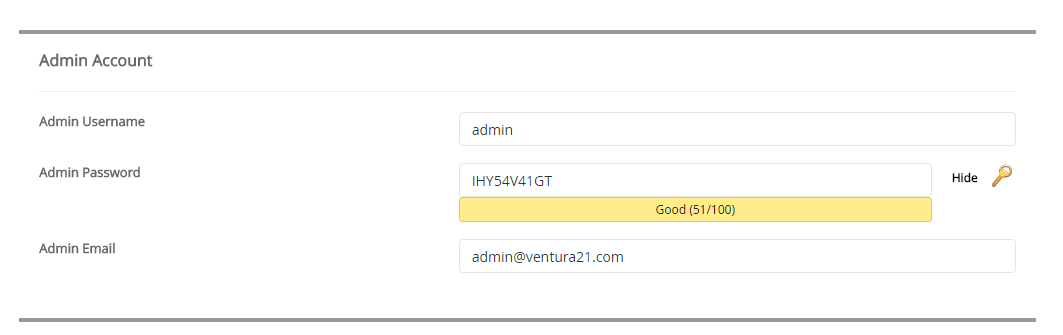
Once the setup details are filled, click on the 'Install' button at the bottom of the page. (if you want to get the setup details you entered emailed to your personal email account, provide your email in the 'Email installation details to' text field. All the details except for your password will be sent to this email address you provide.)
Once installed, now you can visit your website URL and see your website up and running! (with default theme)
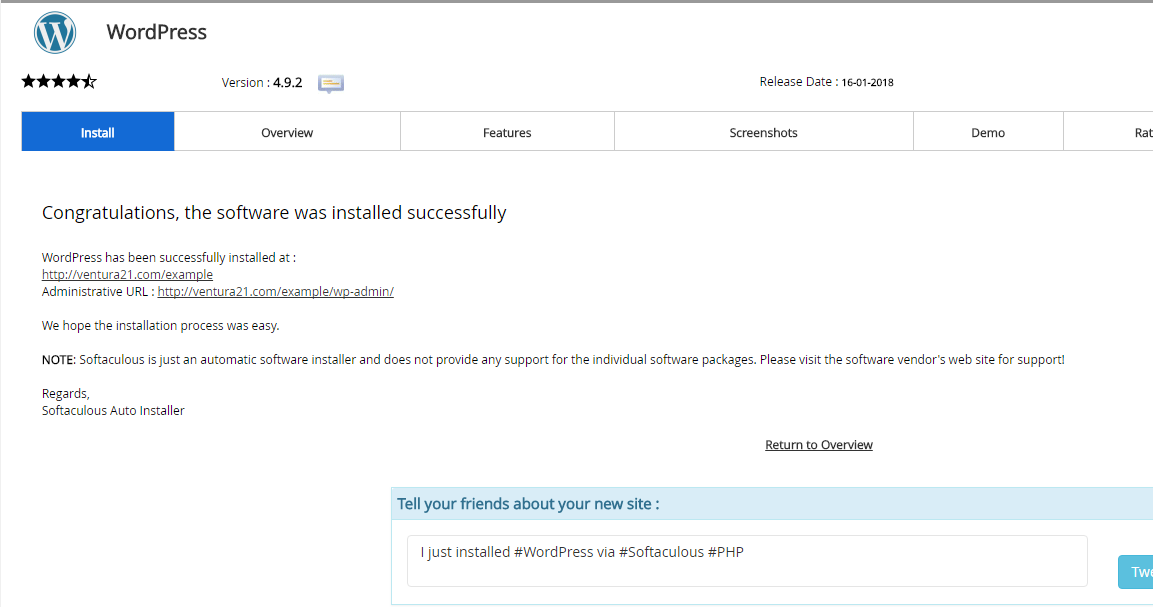
Step 5 - Let's change the default theme
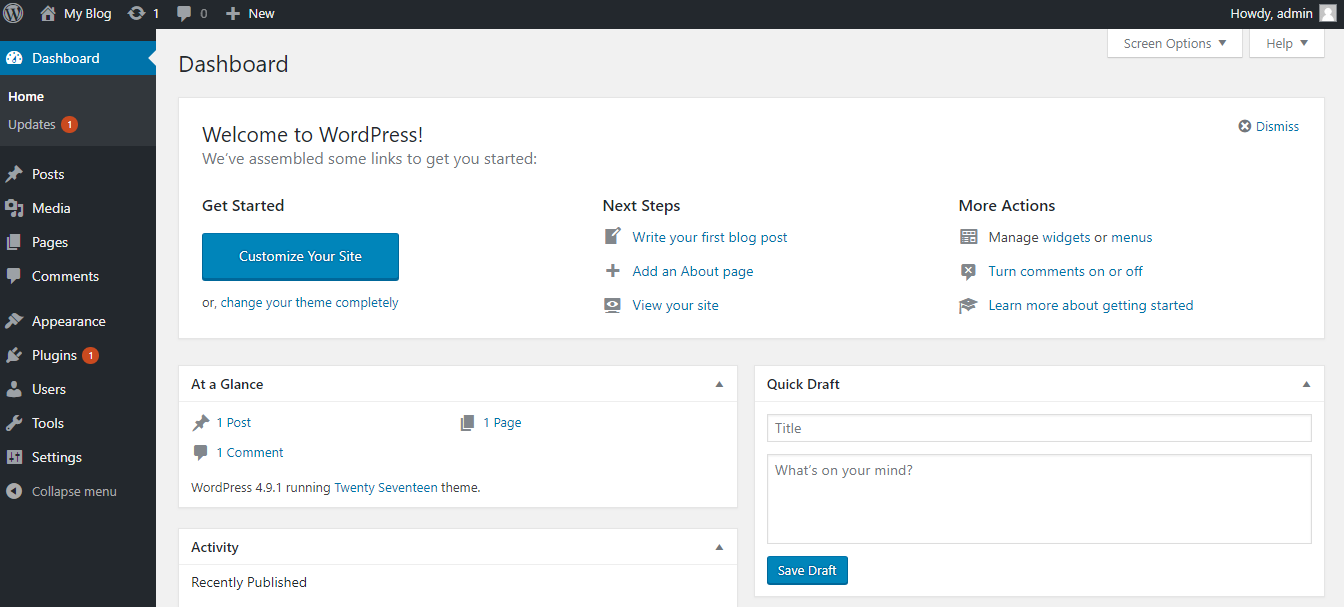
If you need to change the default theme, login to your Wordpress control panel/Dashboard by simply clicking on the 'Overview' menu from the wordpress installation page(above page) which you came across after installing WordPress. Then scroll down to the 'Current Installations' area. Here you can click on the blue colour 'Admin' icon, which will direct you to the WordPress control panel.
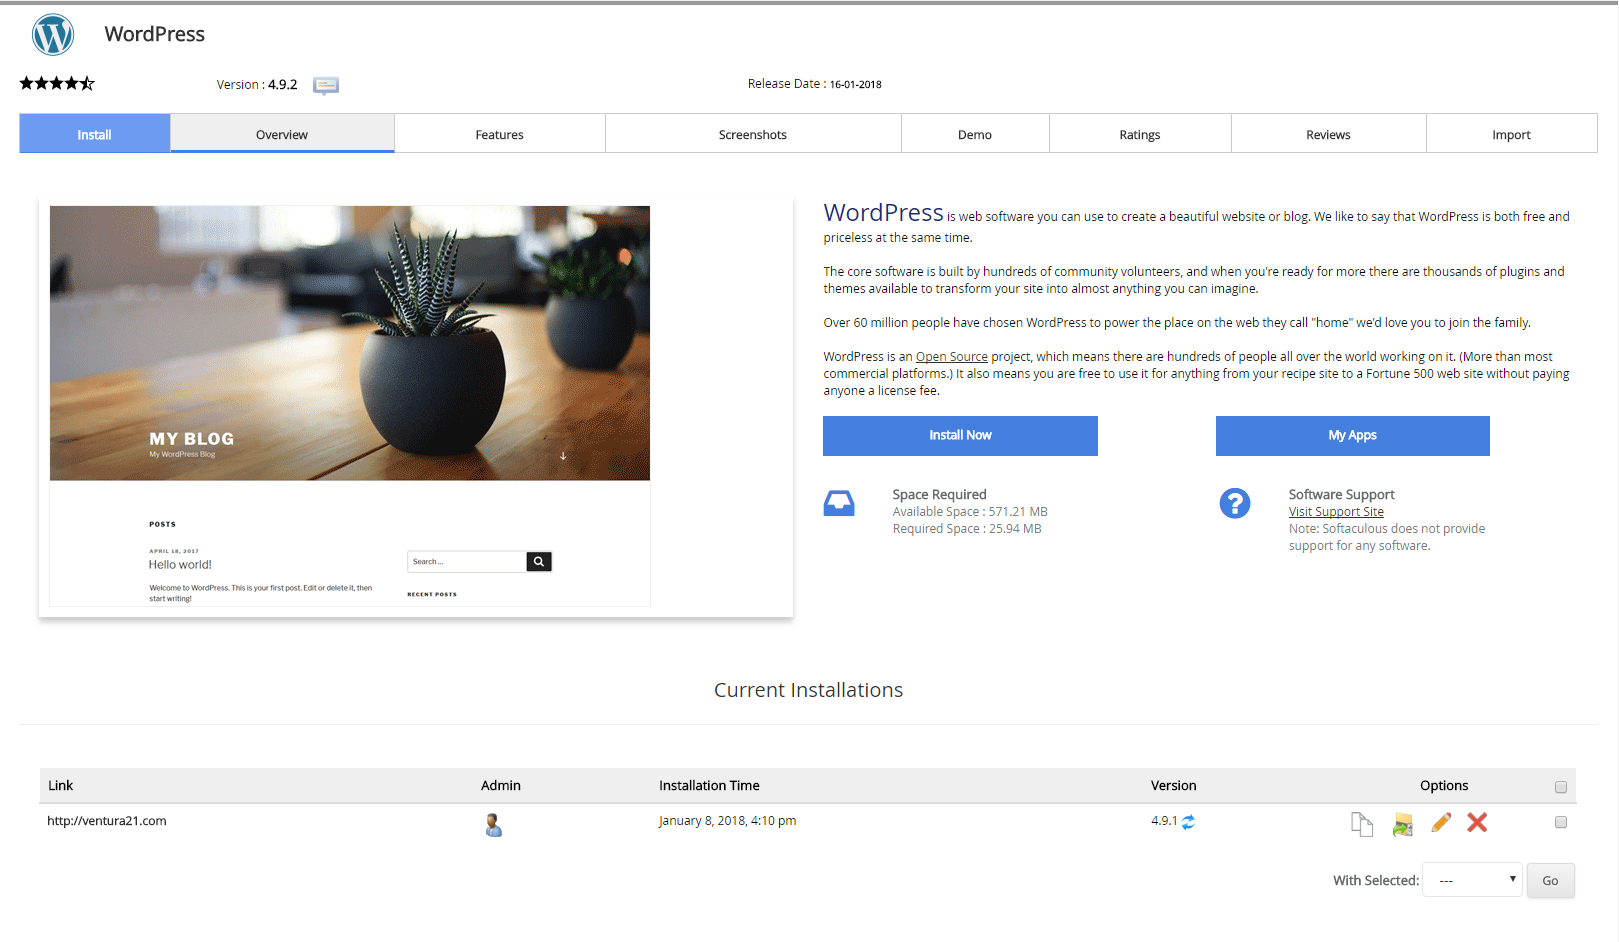
Click on the 'change your theme completely' option to change your website theme.
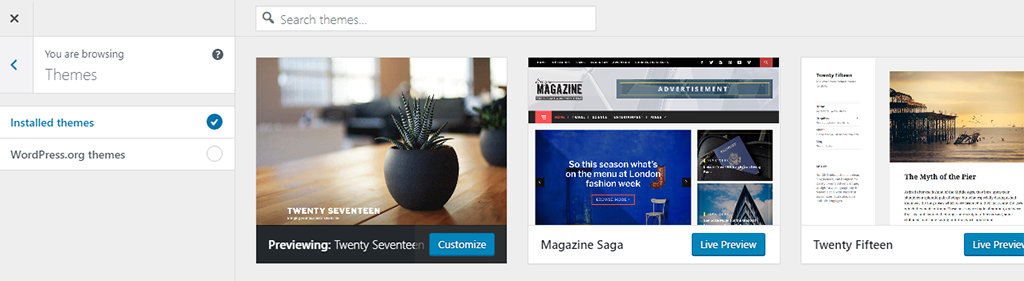
When you click on this, you will be navigated to the themes page which you will see 3 themes which are installed already. If you click on the 'wordpress.org themes', you will be displayed thousands of themes which you can select one and click on the 'Install and Preview' button to configure the theme for your website.
1. First login to Register.lk with your credentials.
2. Once you are logged in, click on the 'Hosting' menu item which is listed in the Top Menu.
3. When you click this, you will be displayed few more sub menu items. Click on the 'My Hosting' sub menu.
4. Then you will be displayed the products and services which you have subscribed with.
5. Click on the 'Active' button listed here, for the website for which you need to log into the control panel.
When you click on the 'Activate' button, you will be navigated to the relevant Product Details page.
Click on the 'Login to cPanel' menu item which is displayed in the left hand corner of the page in order to access the Control Panel.
Now you will be navigated to the cPanel, which you will be able to see many configuration areas.
Now that you are in the Control Panel, let's get your website uploaded or made. Following are the two ways of uploading a website to the domain you purchased.
1. Via File Manager (if you already have a website)
2. Via Softaculous Apps Installer (make a new website using a theme)
1. Uploading your site via File Manager
Step 1 - Click on the File Manager icon
The File Manager icon is located under the 'Files' section of the Control Panel page.
Once the File Manager icon is clicked, you will be navigated to the File Manager page.
Step 2 - Upload your website files to the 'public_html' folder
Your website should be uploaded inside the 'public_html' folder.
Go inside this 'public_html' folder and select the 'Upload' button located on the top of the page to upload your web files. (Note that you should directly upload your website files under this 'public_html' folder. Not under any subfolders inside the 'public_html' folder.)
Once all the files are uploaded, close this page and run your website.
That's it! Yes, it was that easy!
2. Making a new website via Softaculous Apps Installer
Step 1 - Click on the Softaculous Apps Installer icon
The Softaculous App Installer icon is located under the 'Software' section of the Control Panel page.
Once the Softaculous Apps Installer icon is clicked, you will be navigated to the Softaculous Apps Installer page.
Step 2 - Select the relevant Script Type of the website you want to upload
Out of the scripts displayed in the page you are navigated to, after clicking on the Softaculous Apps Installer, select the relevant script (Eg: I will select 'WordPress').
Once I click on a script, say 'WordPress', I will be navigated to the relevant script page.
Step 3 - Install
Click on the 'Install Now' button to install the website.
Step 4 - Setup details
Once you click on the 'Install Now' button, you will be displayed an overlay which you will need to enter the setup details.
Under 'Software Setup', choose the Protocol you wish to provide to your website. If you do not have a SSL certificate in your website, leave it as 'http://'
Under 'Choose Domain' by default it will display the domain name you have provided. Keep it as it is.
The location which the wordpress site should be installed is given under 'In Directory' field. If you leave it as 'wp' the website will be installed inside the wp folder and will not display content when you run the website with the domain name you have given. Therefore, remove this 'wp' wording and leave the 'In Directory' field blank.
The Site Settings can be configured later. (Here you can configure the site name and the welcome description text in the site.)
Under the 'Admin Account' section you can change the Admin Username and the Password. We recommend you to keep the password as it is due to the auto generated password is strong.
Once the setup details are filled, click on the 'Install' button at the bottom of the page. (if you want to get the setup details you entered emailed to your personal email account, provide your email in the 'Email installation details to' text field. All the details except for your password will be sent to this email address you provide.)
Once installed, now you can visit your website URL and see your website up and running! (with default theme)
Step 5 - Let's change the default theme
If you need to change the default theme, login to your Wordpress control panel/Dashboard by simply clicking on the 'Overview' menu from the wordpress installation page(above page) which you came across after installing WordPress. Then scroll down to the 'Current Installations' area. Here you can click on the blue colour 'Admin' icon, which will direct you to the WordPress control panel.
Click on the 'change your theme completely' option to change your website theme.
When you click on this, you will be navigated to the themes page which you will see 3 themes which are installed already. If you click on the 'wordpress.org themes', you will be displayed thousands of themes which you can select one and click on the 'Install and Preview' button to configure the theme for your website.
As you can see, making a website is a piece of cake at Register.lk.
 28-May-2026
 26-May-2026
 05-May-2026
Safe & Secure Payments Accepted via:


