
Live Chat

Domain Scan

(empty)

Login
How to Access Domain Emails through Gmail?
(22-Jun-2024)

Setting up your professional email accounts created on cPanel to be managed through Gmail can enhance your email experience. Gmail's powerful interface, search capabilities, and spam filters make it an ideal client for managing professional emails. Follow this step-by-step guide to configure Gmail as your email client for cPanel-based emails.
Why Use Gmail as an Email Client for cPanel Emails?
- Unified Interface: Manage multiple email accounts from one place.- Advanced Search: Quickly find important emails.
- Spam Filtering: Benefit from Gmail's superior spam filtering.
- Accessibility: Access emails from any device, anywhere.
Refer to our previous blog, "Maximizing Email Efficiency with Email Clients" to understand why you should configure your cPanel emails with an email client.
Before you begin, ensure you have the following information ready,
(You can find the below settings by logging into your cPanel => navigating to Email Accounts => selecting the email account you wish to configure => and clicking on Connect Devices.)
Step 1: Create Your Professional Email Account in cPanel
1. Log in to cPanel:- Access your hosting provider's cPanel login page.
- Enter your username and password to log in.
(If you have a hosting package with register.lk, follow these steps to log in to your cPanel: Log in to your register.lk account => Go to "Services" => Click the "Active" button => Click the "Login to cPanel" button)
2. Create an Email Account:
- In the "Email" section, click on "Email Accounts."
- Click on "Create" to set up a new email address.
- Fill in the necessary details.
- Click "Create" to finish setting up your email account.
(You can check out our previous blog, "Set Up Email Accounts for Your Domain Using cPanel" for a detailed guide on creating professional email accounts in cPanel.)
Step 2: Configure Gmail to Receive Emails from Your cPanel Email
1. Open Gmail Settings:- Log in to your Gmail account.
- Click on the gear icon in the upper right corner and select "See all settings."
2. Accounts and Import:
- Navigate to the "Accounts and Import" tab.
- Under the "Check email from other accounts" section, click on "Add a mail account."
(If you select the "send mail as" option, you will only be able to send emails. To both send and receive emails, please select "check email from other accounts.")
3. Add Your cPanel Email:
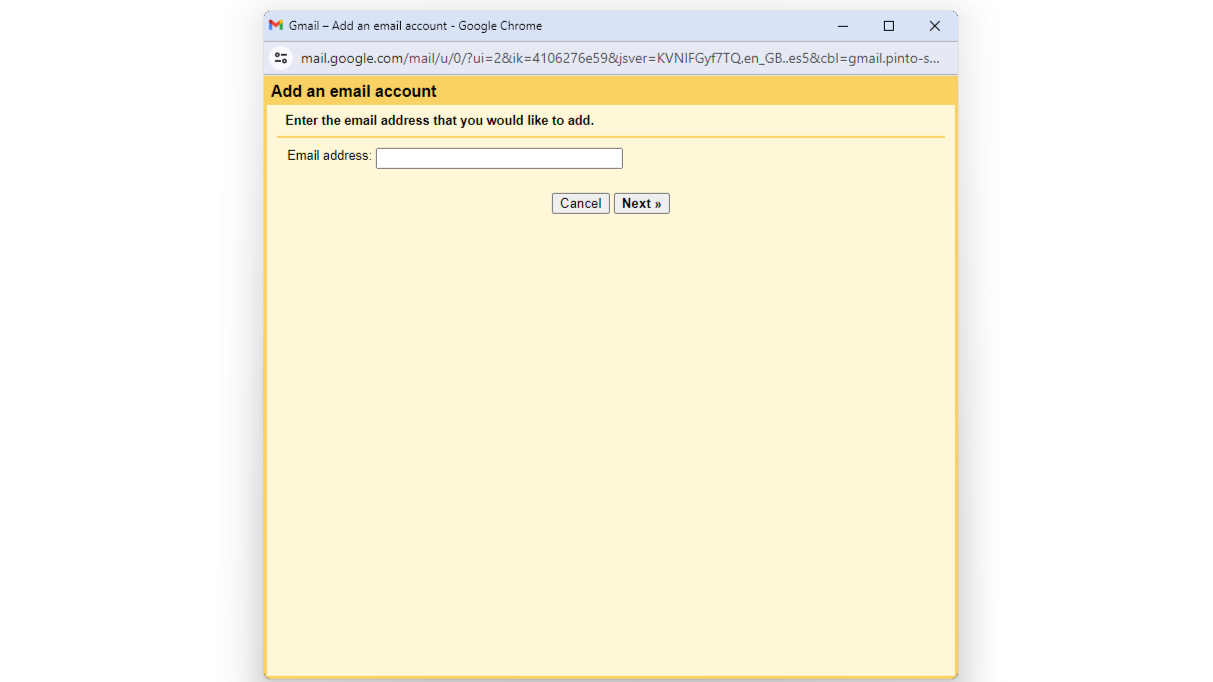
- Enter your cPanel email address and click "Next."
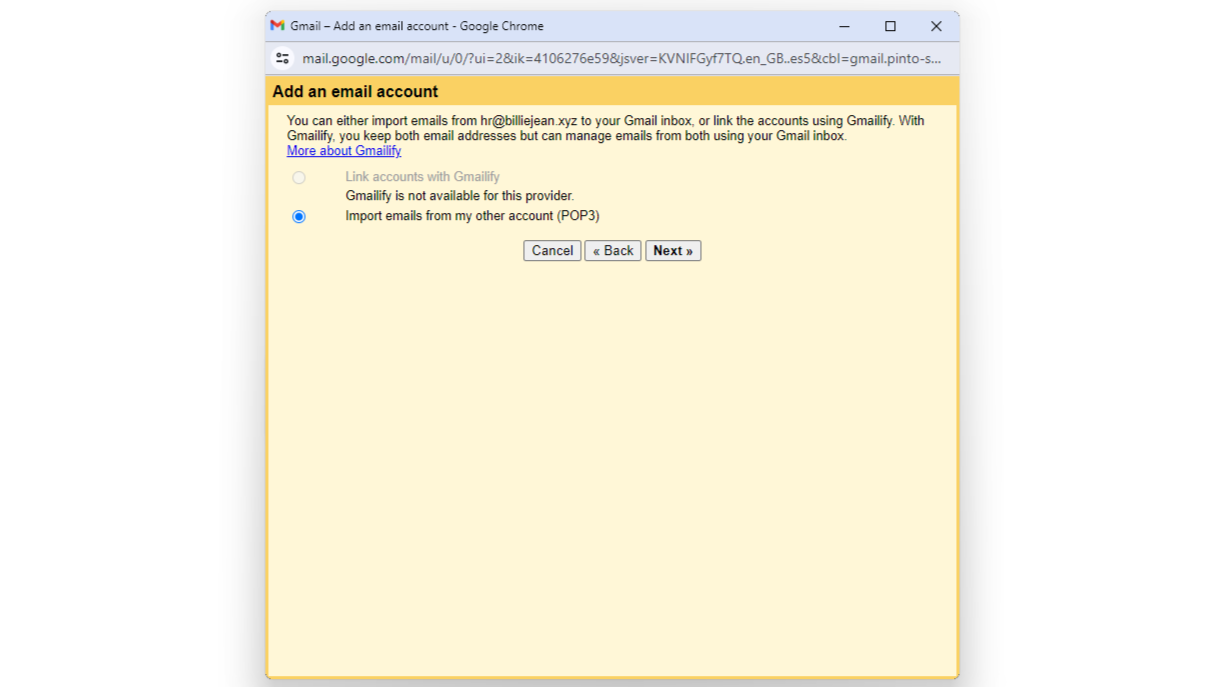
 - Select "Import emails from my other account (POP3)" and click "Next."
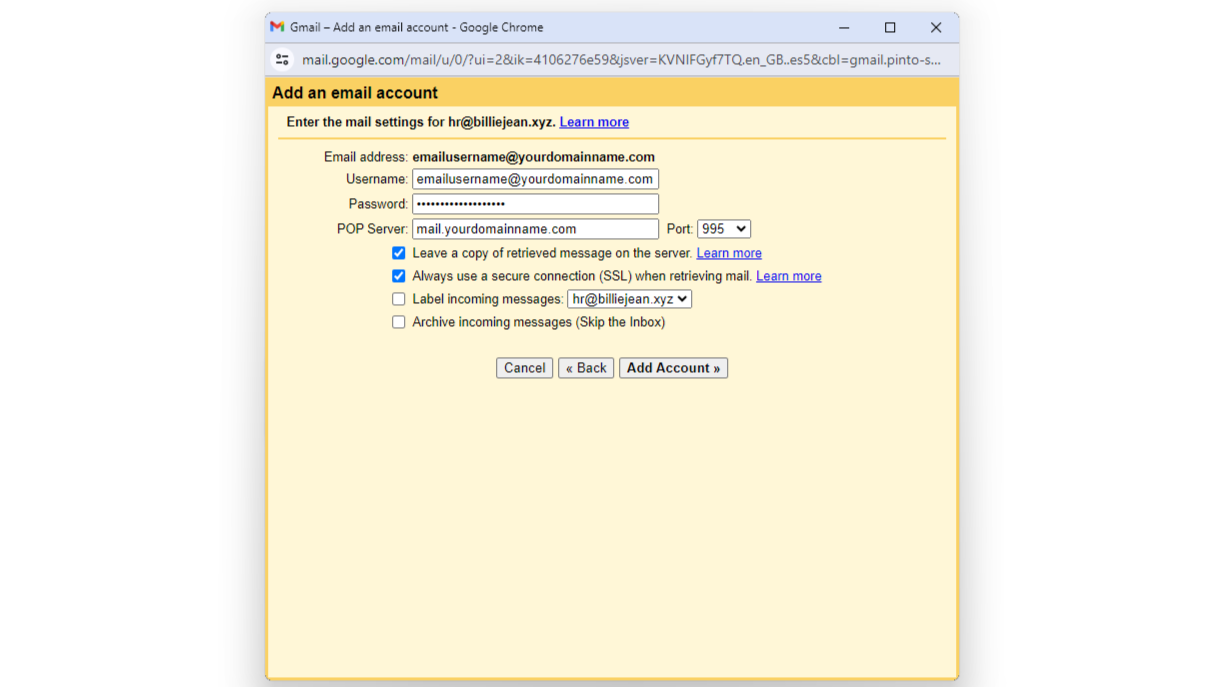
 - Enter the required details:
- Username: Your full cPanel email address.
- Password: Your email account password.
- POP Server: mail.yourdomain.com.
- Port: 995
- Check the options according to your preference:
- "Leave a copy of retrieved messages on the server." (If you leave this field unchecked, the email will be automatically deleted from the server after it downloads to your local device, saving server space.)
- "Always use a secure connection (SSL) when retrieving mail."
- Label incoming messages to keep them organized.
- Click "Add Account."
Step 3: Configure Gmail to Send Emails from Your cPanel Email
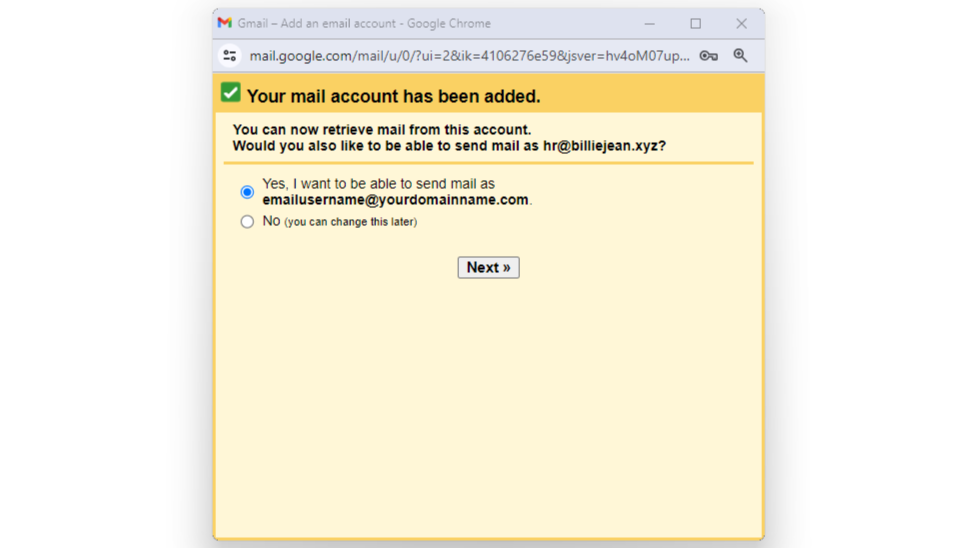
1. Send Emails As Your cPanel Email:- After adding your cPanel email to Gmail, you'll be prompted to set up the ability to send emails from your cPanel address.
- Choose "Yes" and click "Next Step."
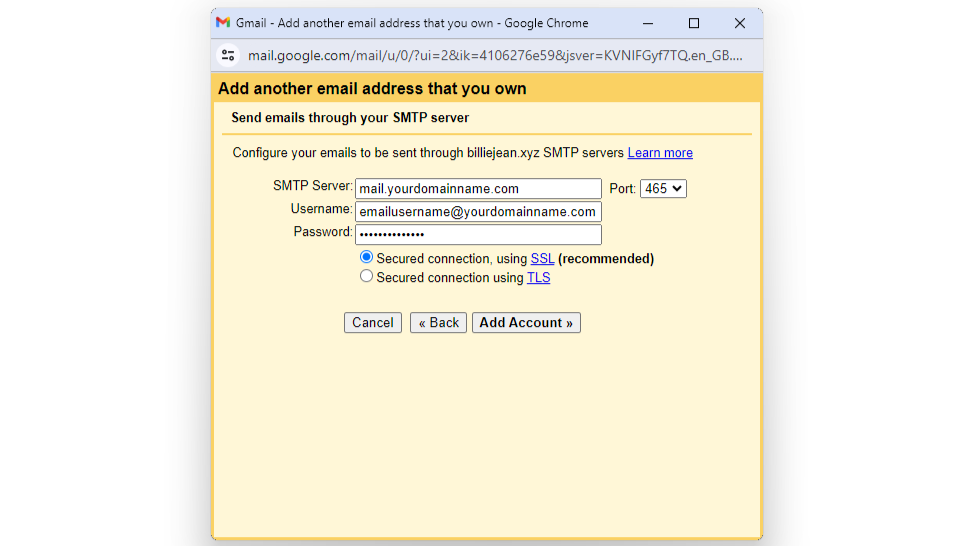
 - Fill in the following SMTP server details:
- SMTP Server: mail.yourdomain.com.
- Port: 465
- Username: Your full cPanel email address.
- Password: Your email account password.
- Select "Secured connection using SSL" (recommended).
- Click "Add Account.
 2. Verify:
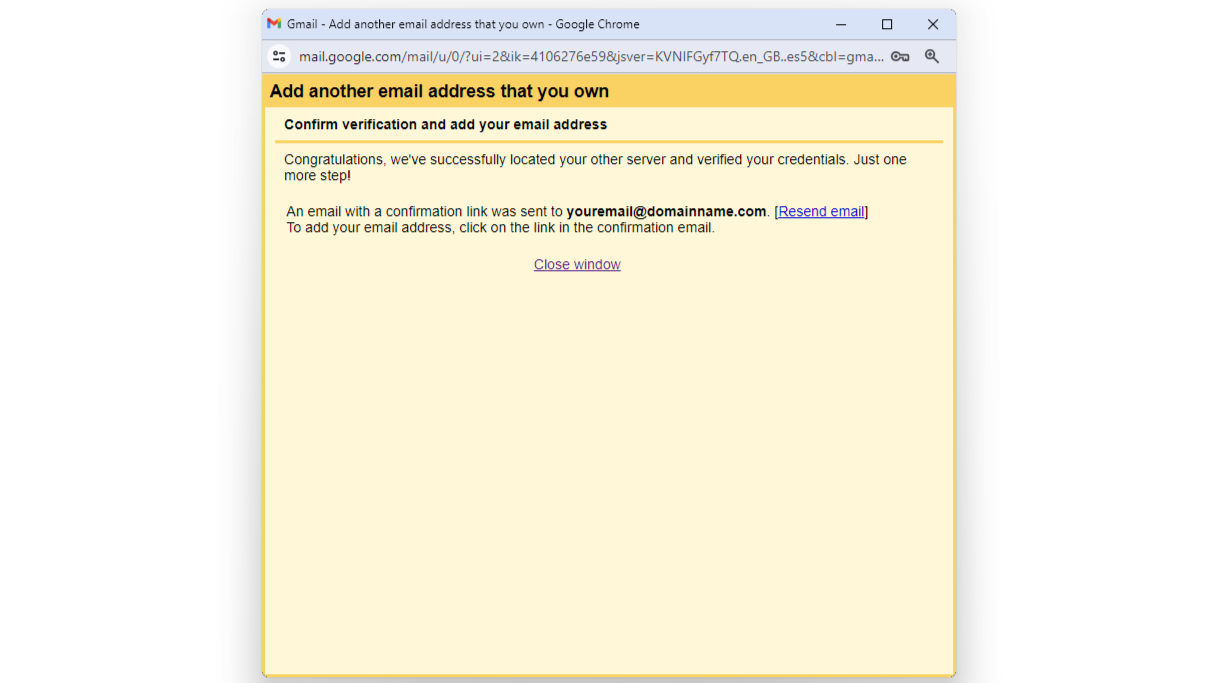
- Gmail will send a confirmation link to your cPanel email address.
- Click on the link to complete the setup.
Step 4: Organize Your cPanel Emails in Gmail
To maintain organization within Gmail, use labels and filters:1. Create Labels:
- Go to Gmail settings, then the "Labels" tab.
- Click "Create new label" and name it (e.g., "Work Emails").
2. Set Up Filters:
- In Gmail settings, go to the "Filters and Blocked Addresses" tab.
- Click "Create a new filter."
- Set the criteria for the filter (e.g., emails sent to your professional address).
- Choose actions like applying a label, marking as important, etc.
Conclusion
Configuring your cPanel email with Gmail can significantly enhance your email management efficiency. By consolidating your professional emails within Gmail, you gain access to a robust platform that offers advanced search capabilities, superior spam filtering, and seamless accessibility across devices. This step-by-step guide simplifies the process, ensuring you can easily integrate your cPanel email with Gmail and enjoy a more organized, efficient, and user-friendly email experience.Follow these steps, and you'll be on your way to a streamlined and effective email management system.
 Written by: Register.lk Support Hero - Shamendra


